Mastering Bokeh Photography: A Guide to Captivating Background Blur

Introduction

Japanese bokeh, meaning “blur” or “haze,” is a famous photographic technique that lends charm to photos. It involves blurring the background while keeping the topic in great focus to isolate your subject and create depth to your photos. This guide will help you master bokeh photography and create stunning photographs.

Understanding Bokeh

Bokeh is characterized by the aesthetic quality of the blur in out-of-focus areas of an image. It is often achieved by using a wide aperture, which results in a shallow depth of field. The background and foreground elements become soft and creamy, while the subject remains sharply defined, creating a pleasing contrast that draws the viewer’s attention to the main subject.

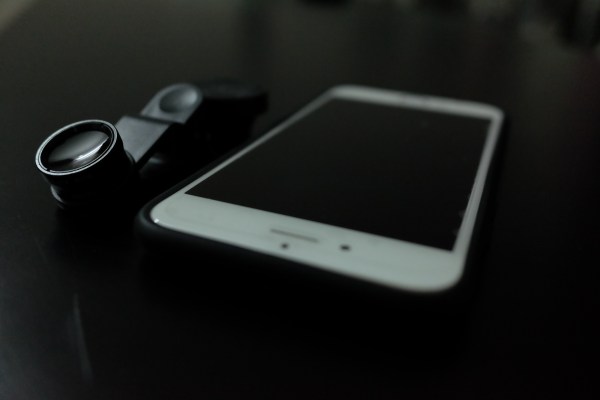
Equipment You’ll Need (minimal)

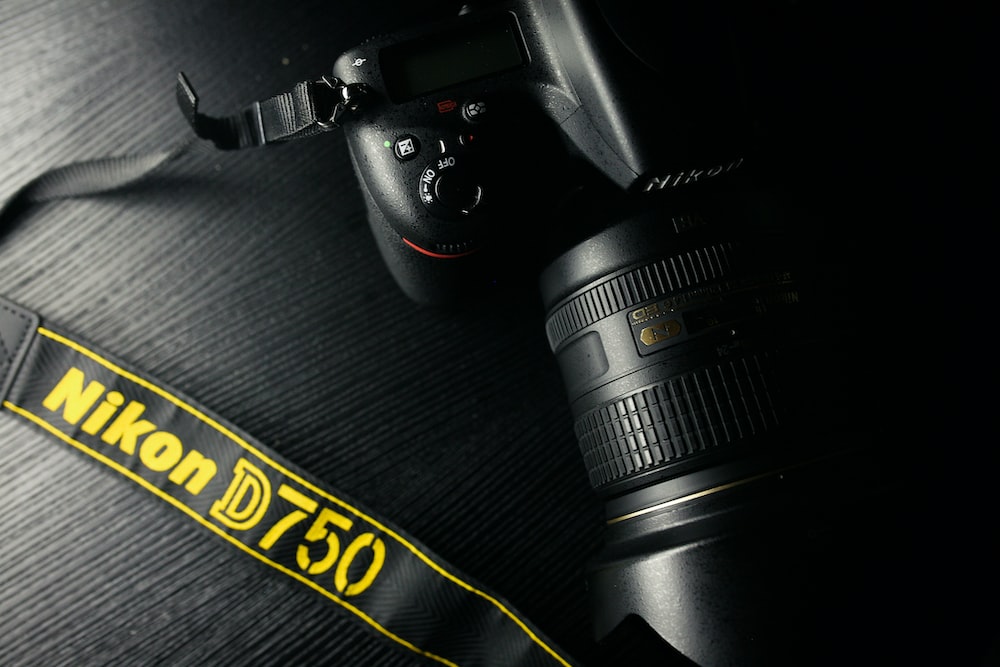
Camera with Manual or Semi automatic Mode: A camera with manual mode gives you full power over the aperture settings. You can change the aperture, shutter speed, and ISO separately.

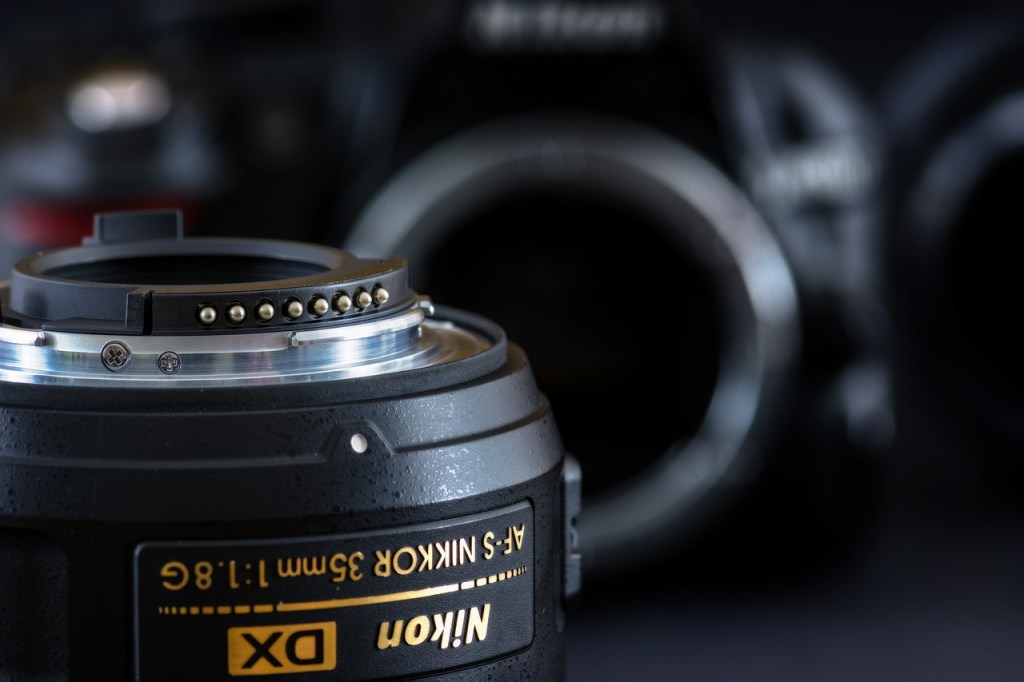
Lens with Wide Aperture: The key to achieving bokeh is a lens with a wide maximum aperture, typically f/2.8 or wider (smaller f-number). Prime lenses like a 50mm f/1.8 are excellent choices for bokeh photography.

Setting Up Your Camera

Select Aperture Priority or Manual Mode: Switch your camera to Aperture Priority (A or Av) or Manual (M) mode. These modes give you control over the aperture setting.

Choose a Wide Aperture: Select a low f-number (e.g., f/1.8 or f/2.8) to achieve a shallow depth of field. The wider the aperture, the more pronounced the bokeh effect will be.

Set ISO: Try to keep the ISO as low as possible. If shutter speed goes too low, you can raise it up to 400 or 800 max.

Focus on the Subject: Prices focus is very important. Since, depth of field is very thin in wide apertures, make sure focus is spot on.

Composing Your Shot

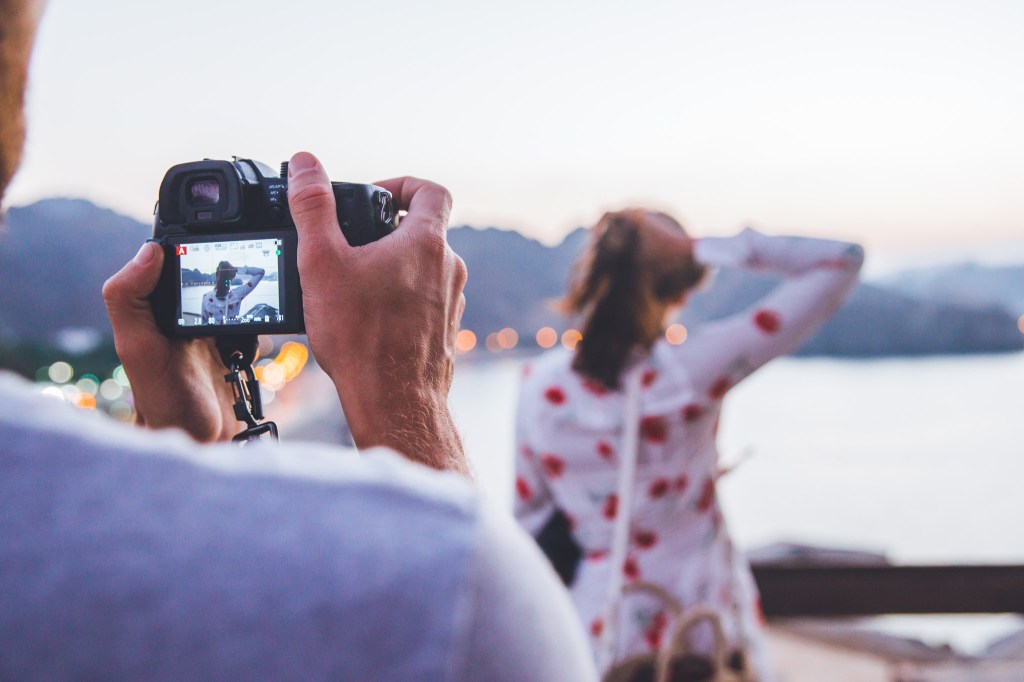
Distance and Perspective: Position your subject at a reasonable distance from the background to create depth in your composition. The farther the background elements, the more pronounced the bokeh will appear.

Background Selection: Choose a background with visually appealing elements, such as lights, foliage, or patterns. These elements will be transformed into beautiful bokeh balls or shapes. The further the background, better bokeh

Frame Your Subject: Frame the subject in a way that background blur should be simpler and not too complex. Choose the background that has some contrast. That way bokeh balls are more visible.

Shooting Techniques

Use a Wide Aperture: This is the key to achieving bokeh. The wider the aperture (smaller number), the better bokeh. Set your laperture to f/1.8 or f/2.8 if possible

Get Closer to Your Subject: Physically move closer to your subject while maintaining focus. This helps to isolate the subject and enhance the bokeh effect.

Zoom In: If you’re using a zoom lens, zoom in on your subject. A longer focal length will compress the background, making it easier to achieve bokeh.

Maintain Adequate Distance: Ensure there is sufficient distance between your subject and the background. The farther the background, the creamier the bokeh will be.

Focus Point: Pay close attention to your focus point. Aim to focus precisely on the subject’s eyes or the point of interest.

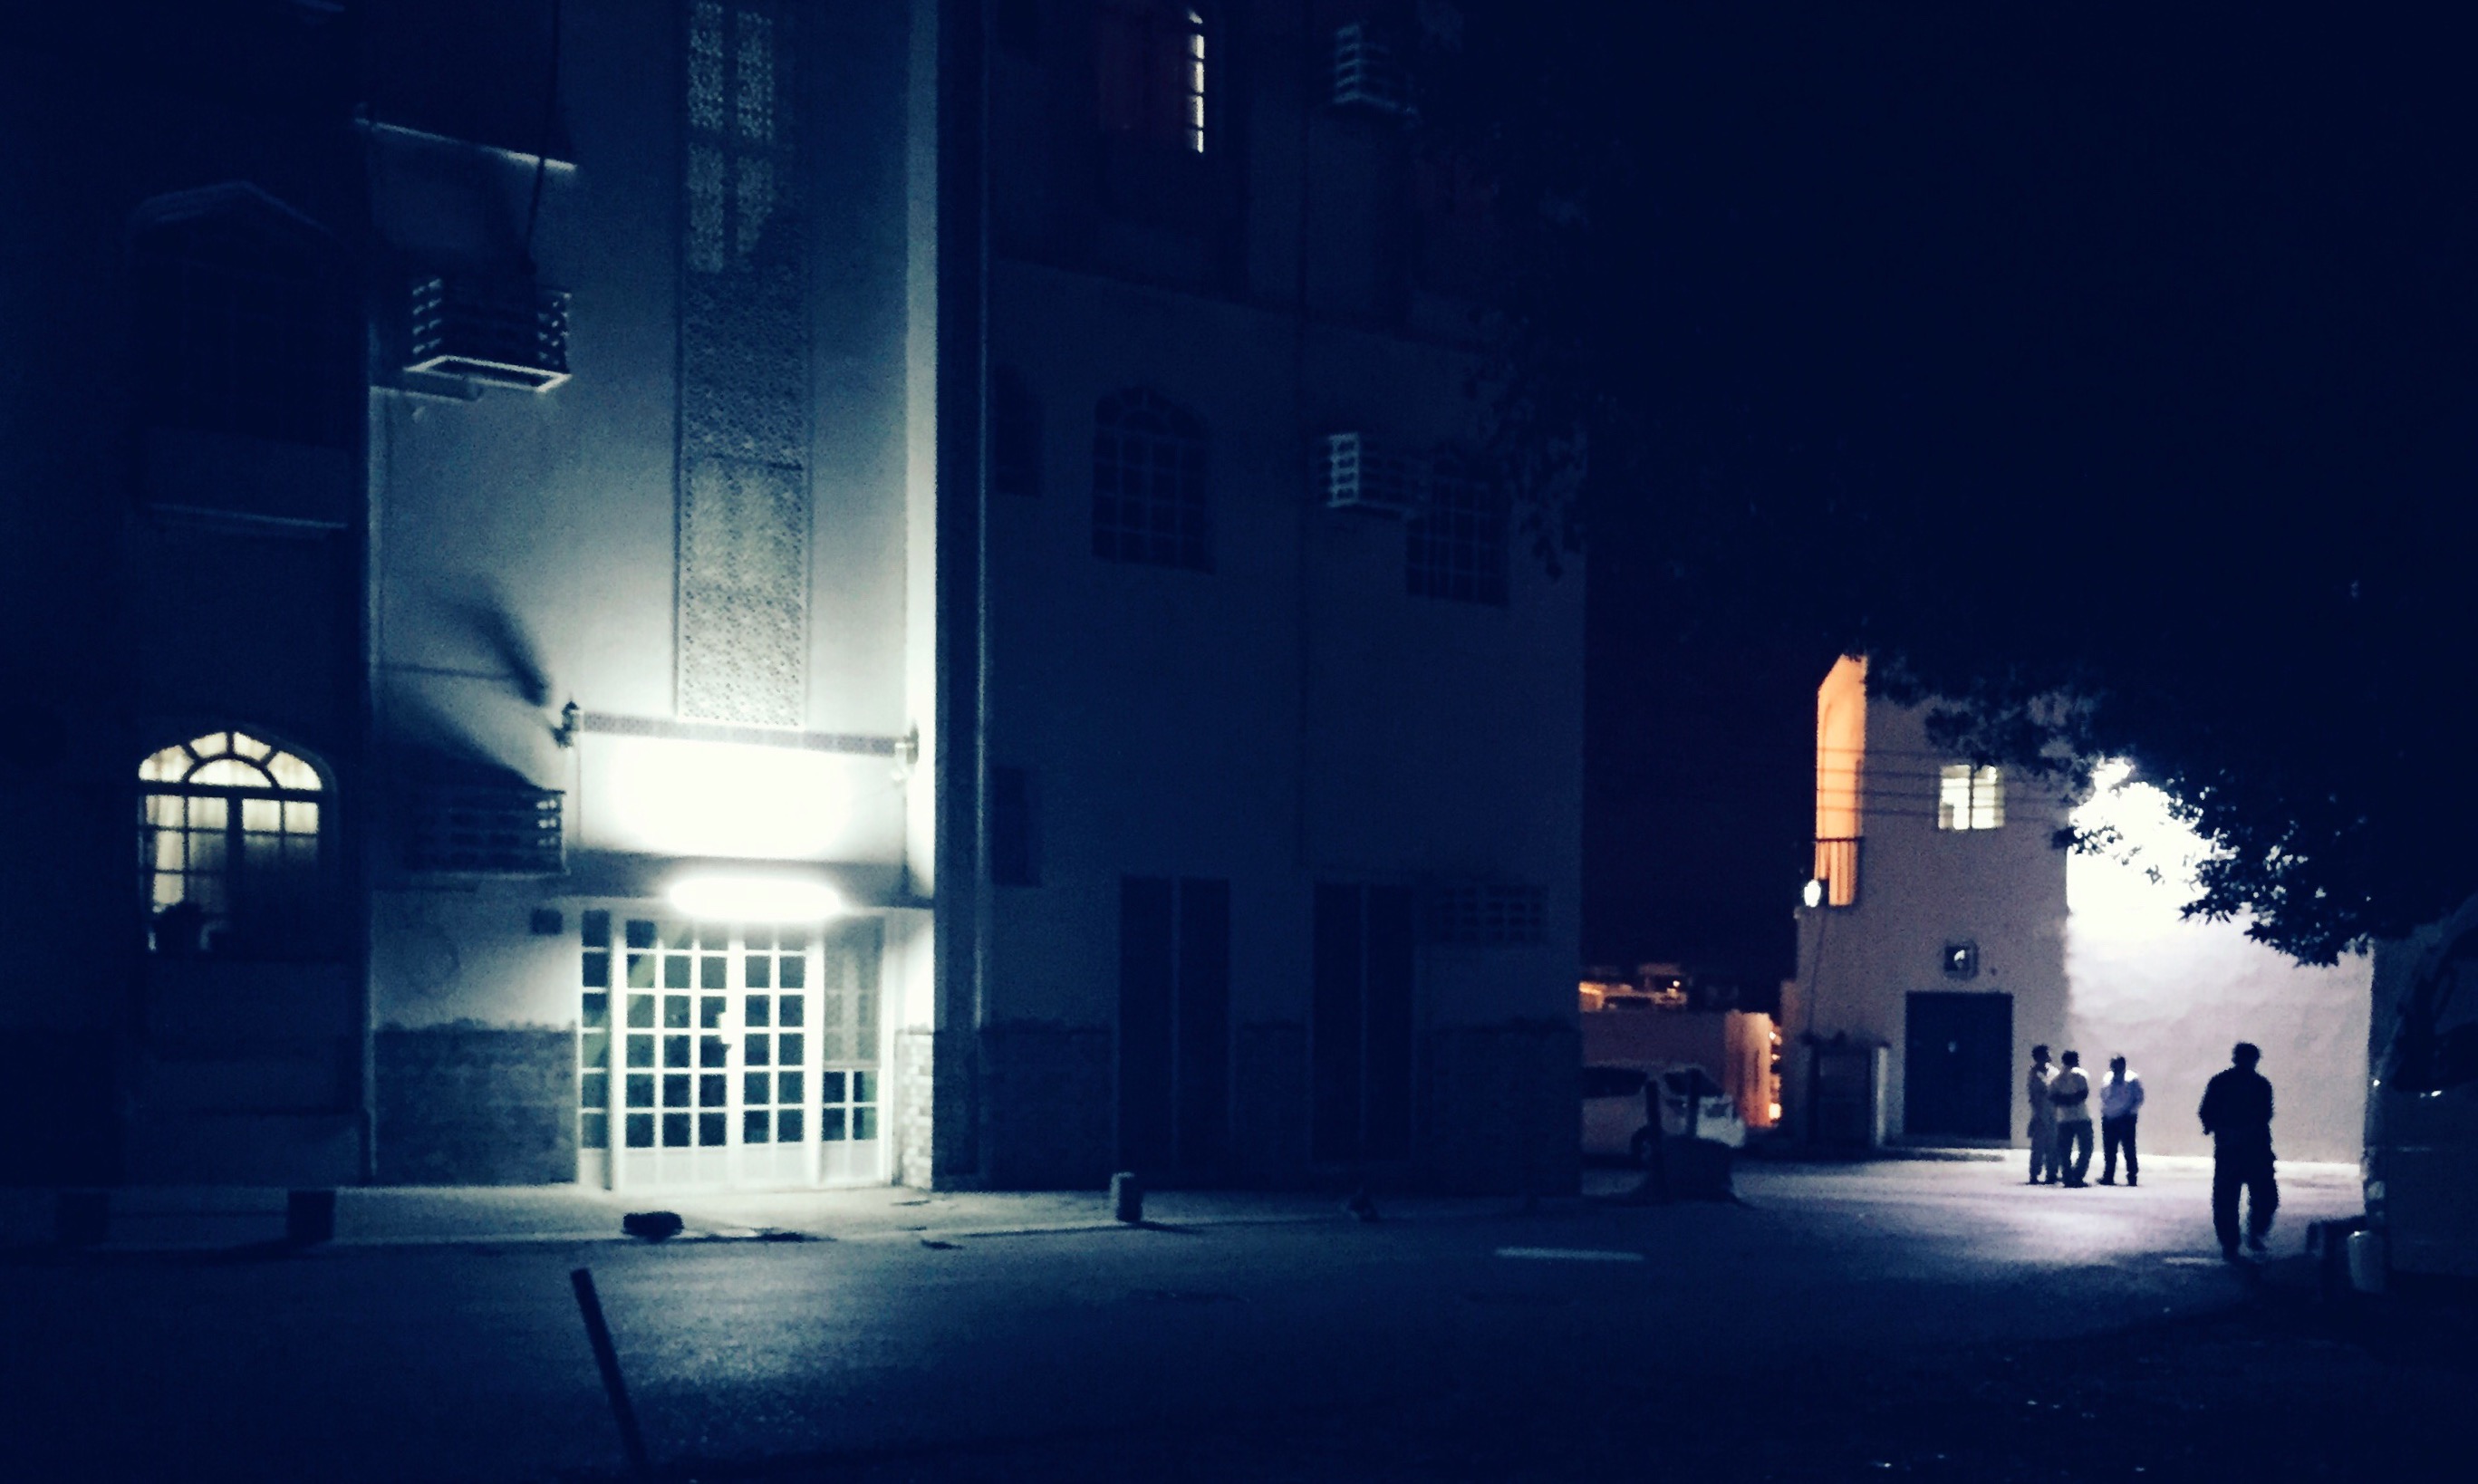
Lighting Considerations

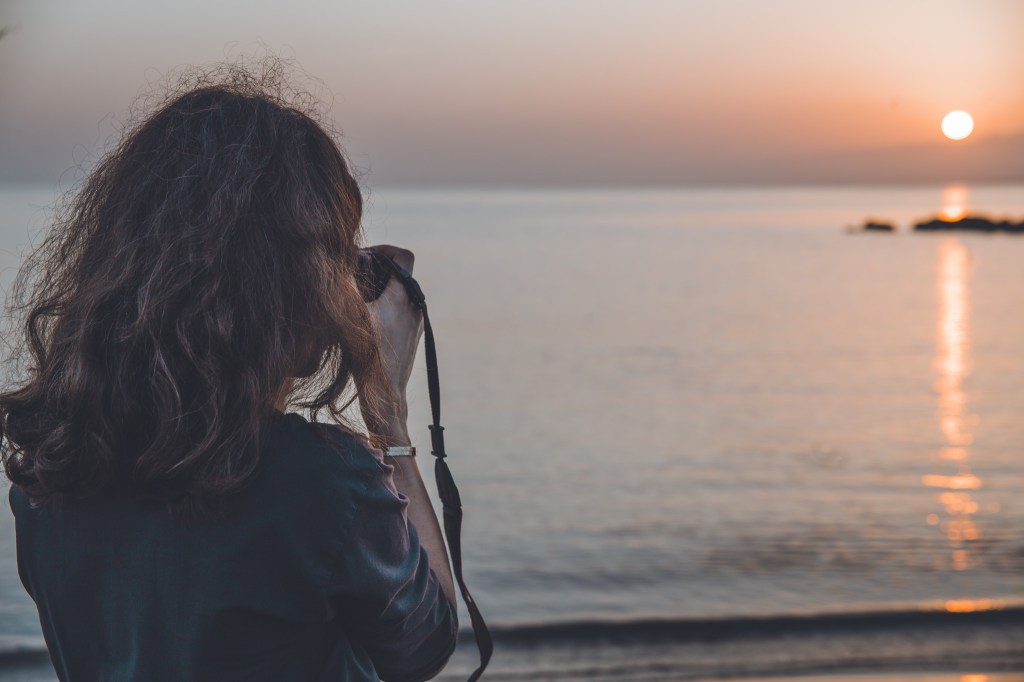
Golden Hour: Shooting during the golden hour (shortly after sunrise or before sunset) provides soft, warm light that enhances the bokeh effect. Warm light usually gels well with bokeh. Also day light looks more natural.

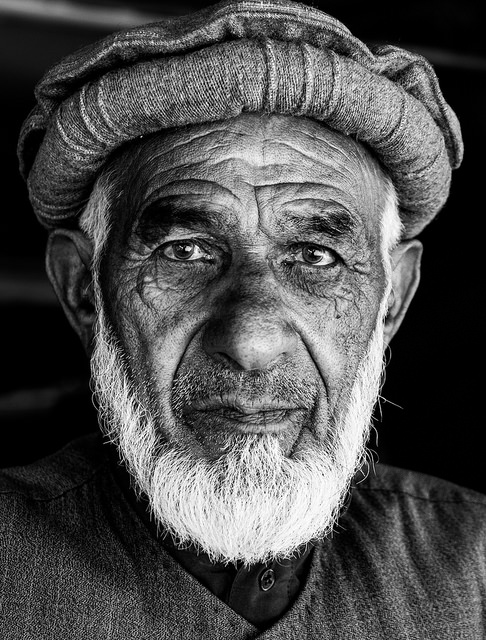
Backlighting: Position your subject with backlighting, such as the sun behind them, to create a dreamy and ethereal bokeh background. This automatically enhances the overall glow of a photograph. It specially goes well with portraits.

Post-Processing

After capturing your bokeh shots, you can enhance the effect further during post-processing. Software like Adobe Photoshop or Lightroom allows you to fine-tune the bokeh, adjust contrast, and enhance colors to make your images truly pop.

Experiment and Practice

Mastering bokeh photography takes practice. Experiment with different lenses, apertures, and compositions to discover your unique style. Don’t be afraid to make mistakes and learn from them. As you gain experience, you’ll develop an instinct for when and how to use bokeh to create captivating images that leave a lasting impression.

Three easy steps of taking a good picture

Most of you, off and on takes a good picture. Whether you are a seasoned PRO or an amateur photographer, you all are proud of some of your work. But the problem is the frequency of which you are producing good quality work.

How many times you faced a situation when after a shoot you check your images,but they are not up to the standard. Do you wonder how PRO photographers produce good quality work on a consistent bases?

If you are intrigue by this questions then this article is for you. The answer to the above dilemma is the Photography workflow. Every PRO photographer has a specific workflow when it comes to taking a picture. Sticking to a specific workflow that gives you good results will increase your consistency of getting good results.

Every photographer has their own workflow

I mostly shoot outdoor/lifestyle and travel/street photography. I devised a very simple workflow that works for me in above mentioned style. You can start with it and tweak it as per your style. It has three steps. Let’s start with it.

1. Identify what caught your attention.

This is probably the foundation of taking a good picture. The definition of an interesting subject is completely subjective. Something might be interesting to you but completely mundane for others.

Before even you lift your camera to your eye, ask yourself what exactly caught your attention. This question is of primary importance as based on that you will continue with the next two steps i.e. lighting and composition.

It could be anything. It could be an interesting outfit someone is wearing on street. It could a beautiful formation of clouds or even some nice pattern or repetition of something. Identifying it initially lets you enhance its impact using other two steps i.e. lighting and composition.

In above two pictures, two things actually caught my attention. The crack on the road and bright red wheel caps of a car. Identifying my subject at very early stage lets me compose my image in a way that enhances and highlighted my subject matter much clearly.

2. Study the Light

It is believed that a photograph is as good as the quality of light. So, studying the lighting condition is very important. Once you identify the subject matter, it’s time to look out for ways to enhance that subject.

Let’s say that you want to take a portrait of a person. Now, most flattering light for a portrait is soft light. You need to think how you can photograph that person in a soft light. If it is possible to move that person to a shade, then do it. If it is not possible than try to change your angle to see if it can be improved.

Simply put, analyze the current light in which your subject is. And look for ways if something can be done to improve it. Sometimes the subject is so interesting that even in bad light it is worth taking a picture but in most cases if you do a little bit of effort, you will greatly improve the quality of your picture.

I took this picture in a GYM/training center. The light is quite dim and only certain areas are properly lit. Since I analysed the lighting conditions earlier, I was waiting for these fighters to come in that specific spot so that they will lit properly.
I took this portrait of a shop keeper in northern Pakistan. I asked him whether he can come towards the shop window so that I can have enough light for a picture. He agreed and I took this picture. Otherwise this portrait will not have that much details and impact .

3. Take your time to Compose

After selecting a proper subject and working on light, it’s time to actually compose your picture. Now this is the step where you can be very creative. This step will let you stand out from other people. Lot of photographers when they photograph certain touristic place or situation, they follow the cliche. Spending a little bit of time on your composition will greatly improve your shot.

You can start off with some basic and cliche shots. That will give you initial confidence. Then make your way to more challenging and creative compositions. Now there are lot of aesthetic composition rules that can be applied to enhance your subject. Few of them are as follows.

1. Try to include something related to your subject either in foreground or background. That will emphasize the overall theme. Environmental portrait photographers do this all the time.
2. Use leading lines to direct viewers towards your subject.
3. If surrounding doesn’t support the subject, either use simpler backgrounds or try to blur it as much as possible.
4. Use dodging and burning in post to enhance your subject. Not exactly a composition rule but it does make a difference.

In this picture the beautiful sunrise caught my attention. So in order to direct viewer towards a sunset, I put a foreground subject i.e. my friend and let her look towards sun. That way viewer is drawn towards the sun even though the sun is out of focus but still it gets more attention.
Here I draw the attention towards my model by using leading lines. All diagonal lines and arches are converging on my subject.

Conclusion

If there is one important thing that I learned over time, it is this. Never hurry when taking a picture. This one practice will immensely improve your picture. Just by delaying shutter click will start improving your pictures.

Make this workflow your day to day practice. It’s not necessary to follow it as it is. You can change it according to your style. But make it quick and simple. That way it will be more practical and can be followed easily.

Try these 7 Essential Travel Photography tips

Introduction

Everyone loves vacation. Usually when we travel, no matter how far and wide, new or beaten path, we all love to document our experiences.

Sometimes it’s our our simple vacation to some nearest locations for a change. Or sometimes we do travel to get some inspiration for our photography.

Travel photography is by far the most loved genre of photography. Here are few tips that will surely help you maximize your productivity while doing travel photography.

1. Pick the right gear.

Selecting proper gear is of prime importance in my opinion. It somewhat depends upon the purpose of vacation. Very few people actually travel only for photography. Majority of people just want to clear their minds. They want to enjoy and have a good time. And in the process they want some good photographs.

The key is to travel as light as possible. For me its just one camera body with one walk around lens. I try not to pack a complete camera bag with 2,3 lenses, laptop and accessories etc.

I always take my canon 6D with sigma 24-70 f2.8 lens. Yes I do miss 20mm focal length for landscapes and 135mm for street portraits. But keeping just one camera-lens setup forces me to look for creative alternatives.

Check out my article on Contrastly : How a single camera and lens can improve your photography. In this article Inexplained how I used Fuji x70 during my entire vacation. It has a fixed focal length of 28mm. If you are into street photography Fuji x70 will be your perfect partner. Check my review of fujix70.

2. Document your own Journey too.

It’s very easy to dive too deep into photography while You are on your vacations. Remember, vacations are meant to enjoyable and if you are too serious about your photographs, you will end up feeling exhausted by the end.

Document your entire journey along the way. Take photographs of your car, hotel room, restaurants where you dine and any tour guide or local food. Capture all the crazy and silly moments. Its these photos that you will cherish after 10 years.

While documenting all these things, you might get a lot of good professional photographs as well. I always try to take proper portraits of people I am interacting while I am on journey. I met one old guy (shop keeper) once on my vacation. I took his portrait and that picture ended up as full page feature on Digital Photo Magazine.

My Travel Photo as a full page feature in DP Mag

3. Hire a Local Photographer as guide.

Not all of us can afford a tour guide, yet alone a photographer guide. But if you are serious about photography or you are on some project, hiring a local photographer will go along way.

Local photographers knows all about the place. they know which time and location is best for which type of photograph. They know where permissions are required and where you can simply sneak and take your shots quickly.

You can search local photographers on instagram. Contact them using DM and describe what you want exactly. Once agreed on a price, you are good to go. I used that concept and now I started my own business based on this.

If you are coming to Muscat,Oman, feel free to contact me ( im.zahid@hotmail.com ) for any photography tour, Photography workshop or on-location vacation shoots.

4. Make the Most out of your time.

Unless you are on a specific project, don’t be too eager. Divide your day time into chunks of time for photography and leisure. Golden and blue hours are definitely important and should be taken seriously for good landscape and outdoor portrait shots.

But after sun is high enough or after dark, still you can do a lot. Harsh light might be bad for landscapes but it is very good for street photography. You can make use of strong light and shadows during this time while walking inside markets and pathways. Night time is good for documenting night life of a city. Even same place looks enitrely different during daylight and night time.

So use your time wisely. Also use bad light for your leisure as much as possible. I usually take a sandwich or some snacks during actual shoot and go to restaurants, movies,shopping and meeting friends during bad light. That way I utilize my time more efficiently and balance my photography/leisure time.

Light and shadows

5. Do your Homework.

It doesn’t matter whether you hire a local guide, photographer or you have a friend. Always do your homework before going to vacation. Always search for worthy locations and local activities. It will help you in making a blue print of what kind of photographs you might end Up when your vacation finishes.

When you are hiring a guide or photographer, always contact them and discuss these in advance. Check with your fellow photographers or friends who have been there. Once your homework is done. It will be much easier for you to check if everything is going in a right direction or not.

6. Mingle with locals.

If you really want to make the most out of your vacation, try to communicate with locals. I know, when you are travelling to distant places, there is a language gap. But you will always find someone that can do it for you or someone that knows a little bit of English.

Communication with locals open new areas for you. You might get unexpected opportunities of photography. Your knowledge will widen as you start communicating with them. You will start to know their customs and traditions etc.

I always communicate with locals and try to capture the real essence of that area. For street and portrait photography, it is the best strategy.

7. Don’t Compromise on your Safety.

Not all countries and cities are completely safe. Even some of the safest countries have few cities that are not safe. So, if someone informs you about something, do take it seriously. If you end up losing your expensive gear or get injured, it will ruin your vacation.

Don’t try to look too overly classy. Hide your brand name on your gear. Keep your eyes open if you think something fishy is going around. Always check with locals about security situation if you are in a city that has a bad reputation.

Some places require permission from certain authorities before taking pictures. Check for these things from local guides or hotel staff first.

Conclusion.

The key to good travel photography is a combination of being at the right place at right time. Whether you are a PRO or an amateur photographer. Whether you have an expensive camera setup or a simple point and shoot. These travel photography tips will still be applicable to you.

And last but not the least. Travel photography is supposed to be fun. So keep it that way. Don’t stress out if you are not getting good shots. Just keep your cool and make use of your time based on my tips while enjoying your vacation.

Peace.

Is smart phone good enough to replace your camera?

This is probably the most searched phrase on Google. The short answer is, YES for 50% of occasions. DSLRs and mirror-less cameras have their own market and they can’t be replaced anytime soon. But smart phones already replaced compact cameras for quite some time. Now it’s their bigger brothers ( DSLR and mirror-less ) that are in danger.
IMG_9116
Smart phone cameras are getting powerful and intuitive day by day. They might not be good for all kind of occasions. Tight head-shots, bokeh portraits and fast moving subjects for example. But for the rest, they are damn good.
Let’s find out what are the strengths and weaknesses of smart phone photography.

What smart phone cameras are good at.

Medium to Medium-wide angle shots.

16976450040_60cbf6bf3c_o

Normally as you increase focal length, the size/length of the lens also increases. This prohibits the mobile phone cameras to use focal lengths longer than wide-angle. The larger the sensor, bigger the lens has to be.
So, mobile cameras uses smaller sensors along with wider focal lengths to keep and lens shorter and pocket-able. These days phones like iPhone X, Samsung S series, Huawei P Series and other brands producing phones with dual lenses. One for wide and one for portraiture.
These phones do help you in achieving selective focus but overall wide and medium shots are the strong areas of mobile phone cameras and if you stick to that range, you can get better shots with these.

Candid Photography.

Processed with VSCO with c1 preset

Candid photography is one of the best areas of mobile photography. Being a street photographer for quite sometime. I know its importance. People usually get uncomfortable in front of a big camera.
They think that there pictures could be on some serious platforms like news papers or television. If you are shooting some candid moment on mobile phone, nobody will bother you. Even you can get some good environmental portraits with your phones with permission.

Natural light Photography

airport

Because of the smaller sensor, mobile phone cameras are not usually very good at high ISO. Indoor light is something that requires their sensors to push ISO and result in pictures with noise.
If you want to really get the maximum juice from camera sensor, try natural light. Go outdoors in shade or find a nice window light. Use cheap mobile lens attachments that give you extra wide-angle to take some good landscapes.
Natural light is easy on sensor because of its light temperature. It will give you clean and noiseless results with your mobile phone camera.

HD quality Videos

Mobile phones normally have a very good perceived quality when it comes to video options. For stills, people can pixel peep but for video there are other things like camera movement, editing and story that far more important than resolution and noise.
iPhone 6 produces beautiful videos at 1080p at 30 and 60 fps. It can even record slow motion in 720p at 240 fps. Use that to your advantage. Record videos where you can’t take your camera easily. Edit them on-phone and create beautiful short and meaningful movies.

Panoramas, Time-lapse and Hyper-Lapses

IMG_2149

These are the things that take a lot of effort if you are doing it with DSLRs. Mobile phones comes with built-in apps that you can use to produce all the fun stuff.
Yes the quality will not be close to Professional camera but who cares? Why you are missing all the fun stuff if you are not selling this tuff to professional agencies.
Again technical quality is not everything. There are other creative things involved in this art form. At least practice those using your phones to get a hang of it.

Sharing

instagram-grid

Probably the strongest side of mobile phone cameras is sharing. With a single tap, you can share your creative stuff to whole world using any social media platform.
Stats shows that 85% of the people are using social media apps on phones and not of laptops. So quality really don’t matter on a 5-inch phone or an 8-inch tablet.
Don’t get yourself stuck with picture quality syndrome. Shoot vigorously and share frequently. You will get immediate feedback that will help you to stay in proper direction.

Where smart phone cameras sucks.

OK then. Enough bragging about the positives of mobile phone cameras. Now let’s look into where they actually suck. P.S. They don’t actually suck. It’s how they are designed.

Low Light.

FullSizeRender

Because of the smaller sensor size, their ISO quality is very limited. The moment light goes below average, phone cameras starts to pour a lot of noise in picture. You can’t help it. If you are in a controlled environment, try to sue external lights. Or find any other source of light like windows etc.
Simply put, phone cameras are bad at capturing low light. Either avoid this situation or bring external light source. Period. It will actually make you better photographer because you have to think about light first before anything else.

Bokeh / Background Blur.

IMG_0557

There are three factors that determine the bokeh in your photograph. Subject distance, longer focal length and lower aperture (smaller f-stop number).
There is only thing in your control i.e., distance between you r subject and camera. Other two are the limitation of smaller sensor and lens size. So they are pretty much not in your control.
So, smooth buttery bokeh is not possible straight out of the camera.You can get a decent bokeh if you place your subject really close and make sure that background is far away.

Fast Action.

IMG_3390

Mobile phone cameras doesn’t have the fastest shutter. They are not designed for that. They have smaller sensors and in order to compensate it, they shoot at slower shutter speeds.
So, bad luck if you want to capture sports moments with it. But if you have enough amount of light and you are outdoor, you can try it. It can produce shutter speeds of 1/200th or 1/400th of a second. Although it is not enough but you can freeze someone walking quickly with this shutter speed.

Tight Portraits

For tight portraits and headshots, you have to get really close and since phone cameras have a wide-angle lenses, they introduce a certain amount of distortion. This distortion bulges the nose and lips and generally produce little awkward portraits.
Try shooting from a little distance and crop it later. You will lose some resolution but certainly get rid of distortion.

Conclusion

Now that, you know the pitfalls of smart phone cameras, you can work around these. As long as you shoot within the limitations, you will get good results. There are entire magazines like Mobiography that are dedicated to mobile photography.
With the increase in mobile phone and social media apps, resolution don’t matter at all. Everyone is seeing your work on small screens so shoot whatever you want with your phone.
The best camera is the one that is with you when you needed it. It’s a famous saying. And it’s so true. Use your camera at all times. It’s an art form. It’s subjective. So, don’t limit yourself and start your creative journey now.

What Is black and white photography and How Does It Work?

Why some pictures look better in black and white as compared to their color counterparts? What few words comes to your mind immediately when you see a black and white photograph? Nostalgia, raw, emotions, etc. ?

I shoot in both color and black and white but there is something peculiar about monochrome. Let’s discuss what is Black and white photography and how it is still relevant today? How it improves your photography in general and when you should avoid it.

1. It’s all about contrast – Painting with LIGHT.

Workers at Mutrah Corniche, Oman

Photography literally means painting with light. When you shoot in black and white, it’s all you have at your disposal. You need a powerful eye to detect proper contrast in your frame to create beautiful images.

Not just contrast, you need to make sure that your subject should stand out in your frame. You need to direct viewers’ eye to your subject. And you have only one thing to play with – CONTRAST.

It really trains your photographic vision because we are used to watch world in front of us in colors. The complementary nature of color creates a contrast in real world. But in black and white photography, you need to create contrast with light and shadows.

TIP : Try to shoot in RAW with black and white creative filter. That way you can see the world in black and white in real-time. You can detect contrast better before clicking it. With a mirror-less camera, you can use this filter even in Electronic Viewfinder (EVF) .

2. Create a better connection with your subject.

The hustle and bustle of Ruwi high street, Oman

One of the advantages of Black and white photography is fewer distractions. In color photography, bright and complementary colors catches viewers attention better. So, if your subject is not bright enough or not in complementary color as compare to background, you are out of luck.

Black and white does your work a bit easier. You just have to concentrate on contrast and not colors. One less thing to worry about. It lets viewers give more attention to subject and its environment. Your message will be much cleaner and easier to understand.

Street photography is better on black and white because of this reason. You don’t have control over your background. So, black and white usually saves your picture. But don’t use this as an excuse to avoid thinking about composition and background. You can check this awesome post The Beginner workflow to street photography for some general tips for shooting street photography.

TIP : Tight Portraits, Street and long exposure work great with black and white. Once you get comfortable with it, try this approach in other niches too.

3. It brings a world unknown to us.

Qantub beach by Imran Zahid-The Shades Photography

As human being, we see the world in color. Black and white is something that we don’t experience normally. If color depicts reality then black and white is your depiction of reality. You can show everyday mundane scenes in a totally new way to your audience.

In Black and white, you can paint the canvas with tones of gray which is completely different in look and feel. Off-course it’s a personal choice but black and white certainly brings a fresh perspective.

TIP: Try landscapes in black and white as very few people have managed to do it correctly. Ansel Adams is one of the best in this business. It will make you stand out among the crowd.

4. It Brings out shapes and textures better.

Portrait of an Old Man at Nathia Gali, Pakistan

Texture and shapes are the second option that you can use to spice up your compositions. The viewers will pay much more attention to these aspect as no color information is there to process.

Subjects that have a strong sense of shapes, lines and curves end up much better in black and white than color. Same goes with texture as well. It evokes the viewer’s tactile sense. Black and white works perfect to add character and atmosphere to you images.

TIP: Old people portraits and multi-layer compositions are the ideal candidates. Black and white will add an extra punch to these type of photographs.

5. It’s much more challenging.

Contemplation at Qantab beach, Oman

Apart from all the above advantages, black and white photography is much more challenging. Just by practicing these tips, you can learn a ton of lessons about composition, contrast and lighting. Choosing a suitable subject for black and white photography is extremely difficult. But with practice you will overcome this thing.

You have limited options to manipulate so you have to come up with intelligent work around to solve the problem at hand. With all these difficulties and limitations, it brings much more joy than snapping an easy picture. Learn more about this on The Power of Black and White Photography.

When you should not use black and white.

We agree that black and white photography is beautiful. still we see a lot of crappy black and white conversions over the internet. That’s because people are converting their images without considering all these aspects. Converting images to black and white will not automatically make you look artistic.

Below are few points that you need to consider before converting your pictures to monochrome.

1. Don’t use black and white to save your already badly composed images. This goes true with noise too. If your image has a lot of noise, converting it to black and white won’t save it. Noise is not bad. Embrace it. But don’t save your noisy images with conversion.

2. Don’t convert your images that add more meaning in color than black and white. Portrait of an old man doesn’t have to be always in black and white. If color adds something to story, go with color instead of black and white.

3. Don’t use black and white as a style statement. People think that shooting in black and white make them fine art photographer. Only shoot in black and white if it really required.

So now that you know enough of black and white photography, what you are waiting for? Go and shoot it 🙂

Up close and Personal – MACRO Photography Tips

This post is also published on PictureCorrect.com. You can find it here.

Whether you accept it or not, we all love MACRO photographs. I mean, who doesn’t like an intensely detailed bug or a flower on a silky creamy background? The first thing that we do after getting our hands on DSLR for the first time is to go to our backyard and start taking flower pictures. But in reality , MACRO photography is much more difficult as it seems to be. I do normally landscape and street photography but recently I decided to give a try to MACRO and found it to be much more challenging technically as compared to any other type of photography.

I just started it, so I am not an authority on it. But I just learned some stuff about it so I decided to write a blog post on it to keep everything in order so that I can start improving on top of it.

Like every picture, a macro has its aesthetic as well as technical aspects so first start with its aesthetic qualities because it’s easier to learn and it doesn’t require any extra gear/add-on.

Aesthetic Qualities

1. Simplicity IMG_8718

The Allium by Imran Zahid

Macro is all about one and only subject. Unlike landscape or street or any other type of photography, it doesn’t and shouldn’t have any layers or multiple points of interests. The image should be damn flat with all the attention leading towards the subject with minimum connection with background. When I am saying minimum connection I mean aesthetically background should not grab attention of viewers. It should be very simple. We can achieve this by either blurring it or using high contrast compositions which is what we call figure to ground relationship.

2. Details

IMG_8746
Apple by Imran Zahid

The ultimate goal of a macro shot is to show the unique and fantasy world that normally we cannot see with our naked eye. So choose your subjects wisely. Don’t select subjects that we used to observe normally in detail. Choose subjects and their angles that we are unaware of. Try to show the absolute level of detail that even if we look closely with our naked eye , we can’t. That’s where the MACRO photos actually shine. That’s why a lot of people are going towards insects and bugs as we don’t normally observe them so closely. As the saying goes , the devil is in the details. So , get extremely close to your subject and try to bring a completely new world to your viewers.

3. Composition

IMG_9240
The Fly by Imran Zahid

Just because there are minimal components in MACRO photograph, doesn’t make it less worthy for putting effort in composition. In fact, composition is extremely vital for the success of macro photos. Composition rules like golden ratio, rule of thirds, diagonals and leading lines were never so important before MACRO photography. It’s very important to create dynamic and fluent compositions or else chances are that even with immense amount of captured details, the photograph will still fall flat on its face. So utilize all those composition rules on macro to make it more interesting and eye catchy.

With all its simplicity, MACRO photography is not at all simple when it comes to technical aspects. Below are some of the technicalities you need to keep in mind while doing MACRO.

Technical Challenges and their solution

1. Limited Depth of Field

IMG_8447-3
Housefly by Imran Zahid

Normally when we do portraits or stock or street photography, we are doing everything in our power to create creamy bokeh and shallow depth of field. But when it comes to MACRO it’s the other way around. We are doing everything to get a few extra millimeters in focus so that we can capture details properly. Because we are focusing very closely (normally only a few inches) , depth of field is literally in millimeters. Now you can do a couple of things . You can go back a little , loose some details but get more focus or increase aperture. Both approaches have their own pros and cons. You can only increase aperture to a limit where diffraction don’t happen otherwise entire picture will be soft. Even if you increase aperture within limits, since it changes exposure, you need to either slow down shutter speed or increase ISO.YES, welcome to Hell of MACRO world. So it’s a whole trial and error procedure to see what’s acceptable for you in given condition.

2. Exposure / Lack of light

IMG_8667-4
The Bee by Imran Zahid

As mentioned above , you need to increase your aperture to your maximum limit if you want your tiny subject to be completely in focus. But with this approach , your exposure will be down by miles. Now in order to get proper exposure , you can do a few things.

  1. You can decrease shutter speed if possible (stationary subject)
  2. Increase ISO to acceptable limits
  3. Use some sort of flash

Best solution is a combination of all. Now a day camera ISO performance is pretty good , so you can go with this option safely. Flash with some modifiers are also cheap. Even popup flashes will work. I do all MACRO work with popup flash. It can produce decent results. Shutter speed cannot be changed in most of the situations but whenever its possible go for it too.

3. Noise Reduction

IMG_8544-3
Daisy Flower by Imran Zahid

Even after all these remedies, still you picture will have a lot of noise especially if you are using crop censor bodies like me. And since MACRO pictures are normally simple in composition with very plan/creamy backgrounds , the noise is very much visible. So, you might not came across this noise issue until now in other types of photography but you need to seriously know how to reduce noise in you photos now. Noise reduction and sharpening go side by side and I can point you to some of very good tutorials on it that really helped me overcome this.

How to do Noise Reduction in Lightroom

How to Properly Sharpen Images in Lightroom

The whole point of this section is not to De-motivate you but to actually prepare you to handle all these issues. They are not as big as it seems. But if you really like your photographs to be what you saw on internet , you need to work around these issues.

Conclusion

Macro photography is really fun. Even on those days where you feel dull and you don’t want to go outside for landscapes, street or any other type of photography. You can do macro in your backyard or even in your room. Its really fun. Its demanding but at the same time very rewarding as well. If budget is not your problem you can certainly go for following gear to help you in your tasks.

  1. Ring flashes for beautiful even lighting or even separate TTL flash for controlled lighting.
  2. Full frame body for better ISO performance.
  3. A good tripod with cable release for stationary subjects.
  4. Flash modifiers and backgrounds for creating some mood in your photos.

Even if you are on a budget, don’t let this hamper your spirit. You can do everything without all fancy gear. You just need to be patient and know have to how to work around these issues. The WORD here is persistence. Stick to your goal and you will eventually able to do it. You don’t even need a dedicated MACRO lens for it. If you are on a budget You can go on following route

  1. Instead of dedicated MACRO lens, go for reverse ring or extension tubes. A little difficult but much less costly than lenses.
  2. Instead of ring flashes , purchase popup flash modifiers. Very cheap in market.
  3. Learn thoroughly how to reduce noise and increase sharpness in light room/Photoshop.

That’s it. Happy hunting

The Power of Black and White photography

I love black and white (  monochrome ) photography a lot. I can’t help it. Whenever I start post processing any of my photograph I always first try to convert it to black and white and see if it looks good or not. I was wondering lately, why I like some pictures more in black and white than in color. This question is very important because it gives the answer for which type of photographs we should convert to black and white and why. So I came up with some of the reasoning that I hope you will find useful and insightful. Feel free to play around with these ideas.

1. It reduces distraction.

15118342204_8d419c7ab7_b_d
The Aim by Imran Zahid.You see how it reduces the distraction of different color clothes of all these people and help you focus of the subject.

Ever wonder why most of the street photography is in black and white? Because in street photography we have very less control on environment. You can’t control the annoying and distracting bill boards and ads all around street. You can’t control the colorful cars and other stuff that grabs all the attention instead of your subject. Yes you can control these things by changing your viewpoint and angle and all that but still most of the time you don’t have that much time and you want to grab the moment quickly. So it helps in saving some of your shots that otherwise don’t work in color. But don’t make it an excuse to not think before shoot in street photography.

2. It helps you emphasize more on story than visual

IMG_0670
Contemplation by Imran Zahid.

In black and white photograph, visual candy is not there so viewer can concentrate more on the story and emotion behind the photograph rather than aesthetics. This where composition became so much important because it’s the only way to tell viewers about the main subject and story.

3. It brings a world unknown to us

15915231572_f450b356ff_b_d
Down the memory lane by Imran Zahid

IMG_7841 - Copy-3
The Journey by Imran Zahid

We as human beings are bound to see things in colors by default. Black and white brings a whole new world in front of us that we are unaware of. It makes it more uncertain and exciting for us to see things in entirely different way. It brings that antique and classic look into the pictures which make them timeless and precious. That’s how our mind works when we see any black and white photograph.

So these are the main reasons why we like black and white photographs. The photographs that tell story bound to have these characteristics and are best suited for monochrome treatment. Now here is the list of techniques that you can employ to create really stunning black and white photographs

1. Composition

palace (2)
The Road by Imran Zahid

Composition is everything in any type of photography and in black and white, it is literally everything because you don’t have colors to complement it. All you have is composition. Through proper composition you can direct the viewer to observe certain parts as subject and remaining as background. Placing a subject to the strongest part in frame and arranging other elements is really important and it makes or breaks any image. Rules of composition like rule of thirds, leading lines and negative space are the key to black and white photograph.

2. Contrast

tea_making
Tea making by Imran Zahid

Black and white photography is all about contrast. The more the better. A lot of shades of grey will not make a dramatic black and white photo. Drama starts where there is more contrast, more blown out and darker areas. These imperfections are actually the one that creates emotions in black and white photography. Always look for contrast in a photo. One tip regarding exposure. Expose for lighter areas as you can recover details in darker areas more easily in RAW files as compare to recovering highlights. Another tip is to shoot in RAW format and set built in black and white option. That way you can see the result immediately and even if you want color RAW file always contains color information. One final tip regarding conversion to B&W is to use separate color sliders after conversion to adjust certain parts of image like blue color to adjust sky. Also you can use luminescence sliders to adjust areas by their brightness.

3. Convey an emotion or story

18622493935_a0f24aa9a8_z
Wisdom by Imran Zahid

Since a black and white photograph doesn’t have colors so you cannot just purely depend on visuals. You need to convey some story or some emotion else your photograph will fall flat. It doesn’t have to be a photo journalistic in nature. A simple smile or some interesting character in its surrounding is more than enough but make sure it conveys enough details.

4. Look for strong shapes and texture

TheCave
The Cave by Imran Zahid

Strong shapes and lines and curves always makes a photo more interesting. In black and white it is much more prominent as these strong lines and curves actually defines edges and separates one object from another. So try to integrate some strong lines and shapes for better definition and detail. Texture is also more observable in black and white photograph than in color.

5. Look for some interesting light

15486699860_874eb5331b_z
Walking Shadows by Imran Zahid

Try to look for dramatic/directional lighting source in your photograph. Directional light defines edges more clearly and hence bring details and definition in your objects. It can bring contrast in your photograph. Also dodging and burning is one classic technique that a lot of black and white photographers use to highlight the areas in image that they want their viewers to concentrate more on.

So here it is . Everything I know and discovered about black and white photography over the time. If you didn’t tried it. Do it. Its worth it. Its a bit difficult in some respects but its timeless.Its creative and worth giving a shot. Feel free tp pitch your ideas in comments sections.


Blog at WordPress.com.

Up ↑