Photography Composition Essentials : Depth or Perspective

This post is second part of the series ‘Photography composition essentials‘. You can find other parts here.

If your photograph engages a viewer more than 5 seconds, it means it has something for the viewer to look into. If we keep aside the story part and strictly look into the aesthetic aspects of a photograph, what composition rule or principle actually responsible for all that viewer’s attention? It is Depth or Perspective in a photograph.

As we all know, a photograph is a two dimensional plane and normally it doesn’t fully recreates the actual emotions of what we saw at that time ( and it never will. That’s why we should enjoy the process of taking photographs whether we get a shot or not). If anything that can help viewer to feel a little bit of reality in a photograph, then it is DEPTH. It is the THIRD dimension of a photograph and one of the key composition rule in photography.

What Depth really offers to the viewer is an artist’s preferred way to look into the picture. The user starts from foreground, moves towards the subject and then the rest of the information is filled in by the background. The only thing that is important is actually the relation of all these elements to fill in all the missing parts.

I actually didn’t notice that much about depth before I decided to write a post on it. I was merely using it for the aesthetic aspect of my photographs. But when I actually start thinking in more detail, I started to embrace its value even more. It prepares a ground for every picture and convince the viewer that this picture is a piece of artwork and not just another snap. It separates a good luck artist from a photographer that is consistently producing good pictures.

I am a landscape lover and I do agree that a lot of the time I get good photographs by chance 🙂 and instead of taking consistently good pictures by doing my homework, I am used to increase my chances by taking MORE pictures. That’s how I used to cheat my luck because it gives me the same net results. But this approach actually hurts you when you try to go PRO because you can’t come again and again to same location and try your luck when you do professional work. That’s why people willing to hire professionals because they give them sure results the first time they get a chance.

So if you want to be a PRO then start taking it more seriously and try to conceptualize the photograph before lifting your camera to your eye. Check whether you got enough DEPTH in your photograph that can engage viewers and if not, move towards some different angle or location until you find a decent spot to convey a reasonable DEPTH.

SO now I am going to show you some of my images that in my opinion have decent depth aspect. Keep in mind that I am not a PRO and I am still working on my stills.

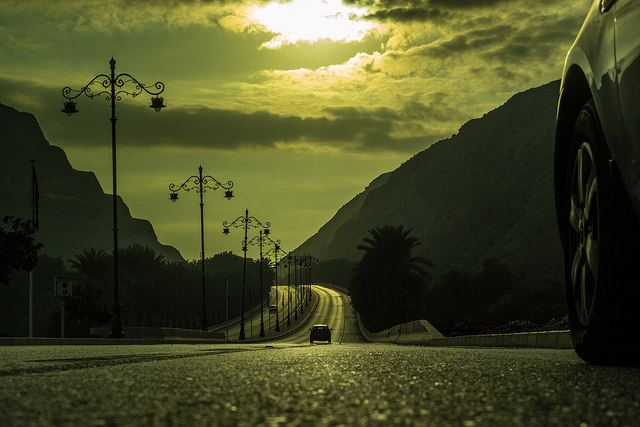
1. Muttrah Corniche Sunrise , Oman

IMG_8047)72dpi
Muttrah Corniche by Imran Zahid

It starts with a boat (foreground) moving through the restrooms / parking (middle ground), all the way to the distant trees mountains and beautiful clouds (Background). All these things are related and complement each other. They depict the typical setting of a beach-side resort. The shoreline here is connecting all these levels together making it one complete picture.

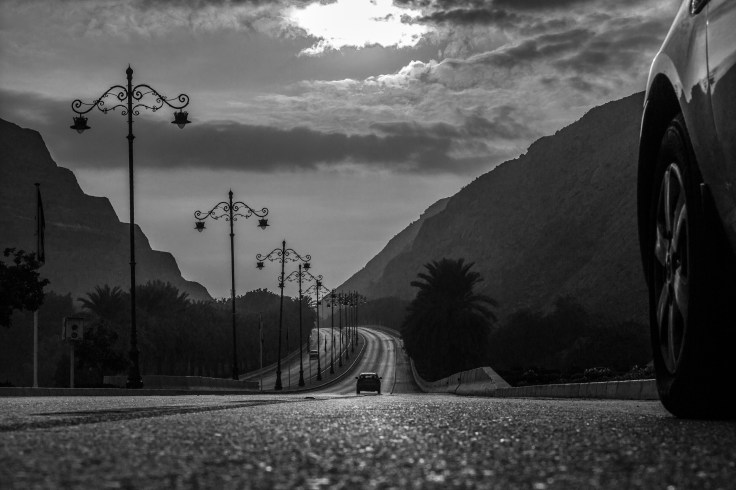
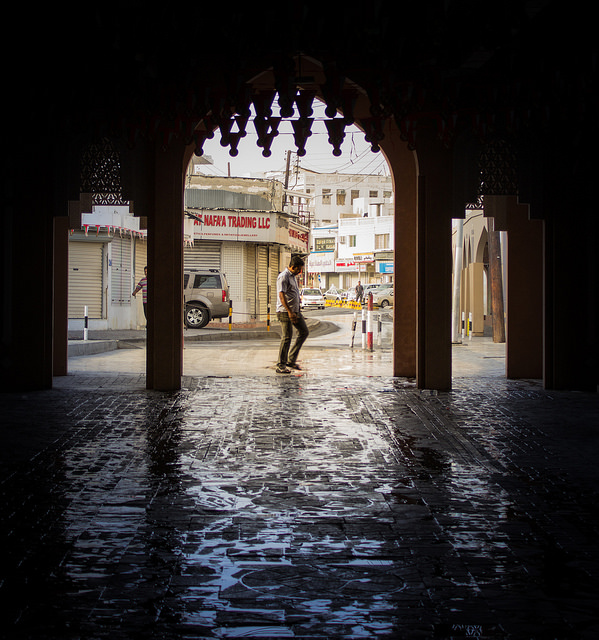
2. Sur Sunrise , Oman

Silhouette-sunrise
Sur Road by Imran Zahid-The Shades Photography

Here the road is leading towards the main subject i.e. Sunrise (Background) but instead of just a plain sunrise it leads towards it through a person standing (foreground) and town houses (middle ground). So it conveys enough details for viewer to observe. The on-going street light gives a sense of distance between all these levels.

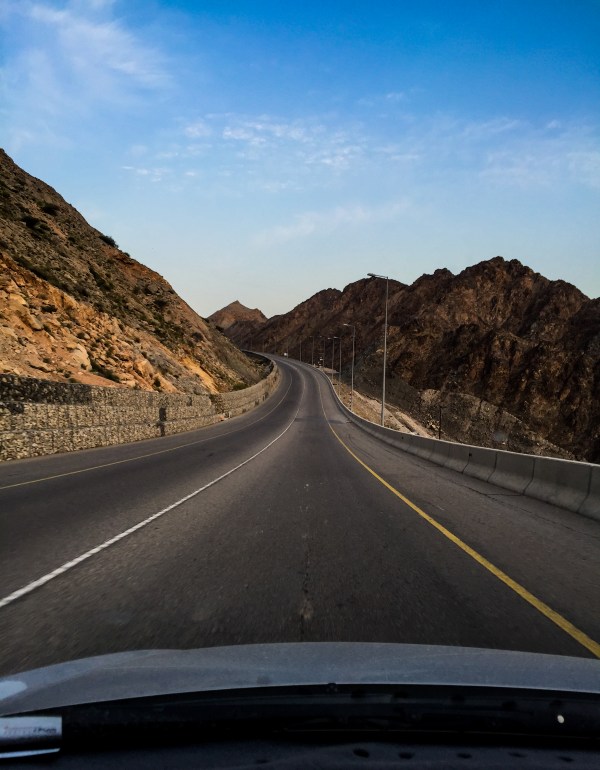
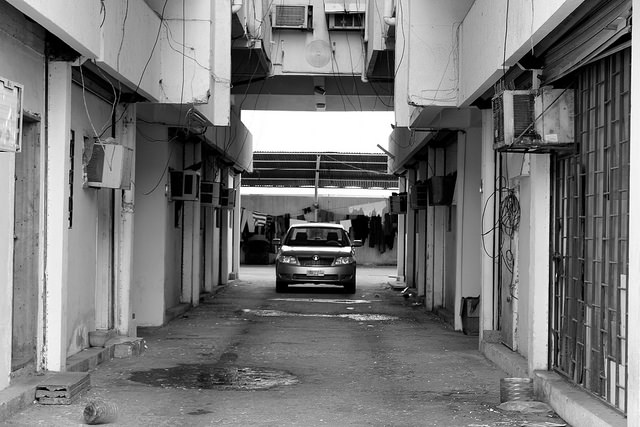
3. Sidaab Street , Oman

Sidaab Street by <a href='https://theshadesphotography.wordpress.com/'>Imran Zahid-The Shades Photography</a>
Sidaab Street by Imran Zahid-The Shades Photography

This is sidaab street in Oman that leads to the Royal Palace. The main subject of this picture is actually the road and the journey (middle ground) but to create enough interest I put a car tire (foreground) and mountains and clouds (background). The street lights provides a sense of distance among foreground/middle ground and background.

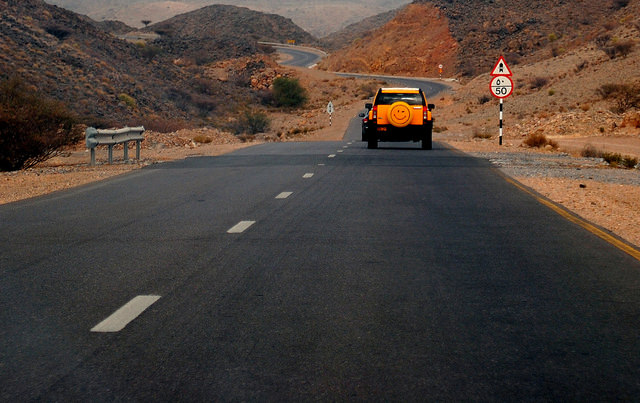
4. Why So Serious , Quryaat Road Oman

Quryaat Road by <a href='https://theshadesphotography.wordpress.com/'>Imran Zahid-The Shades Photography</a>
Quryaat Road by Imran Zahid-The Shades Photography

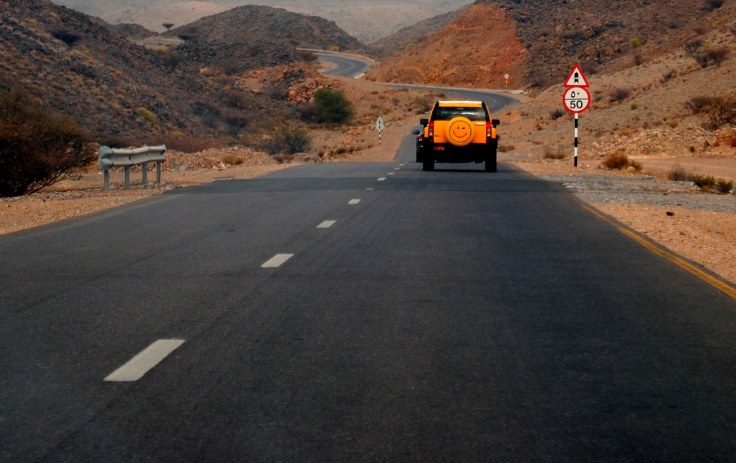
I guess by now you know that I am obsessed with roads and I accept that I love roads and I found them to be a very attractive subject when it comes to depth and perspective. Here off-course that car with a smiley spare wheel is the subject (middle ground) along with the road in front (foreground) leads towards the subject and all the way to the mountains (background).

OK, enough of landscapes and roads. Now I am going to show you some examples from street/people photography too.

5. The fisherman , Sifah beach , Oman

15817282539_a328351f1e_z
The Fisherman by Imran Zahid

Here there are no leading lines but from the proportion it is clear that fisherman on left is our subject(foreground) which is complemented by the boats (middle ground) and it goes towards the sea where he used to do fishing. All levels are perfectly related and gel together.

6. Muttrah Fish Harbour , Oman

Mutrah Fish Market by <a href='https://theshadesphotography.wordpress.com/'>Imran Zahid-The Shades Photography</a>
Mutrah Fish Market by Imran Zahid-The Shades Photography

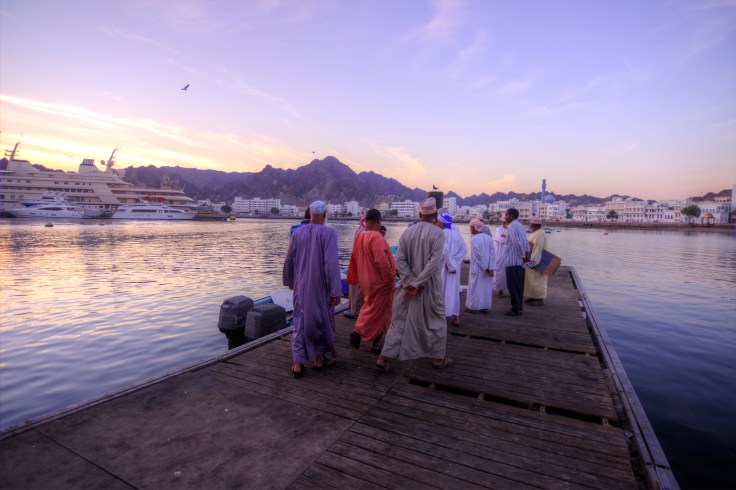
The people here are either fishermen who came from fishing trips or the buyers who wants fish. The composition is simple. It starts with harbor (foreground) towards subject( which are fishermen in middle ground) all the way to water and their ships (background). No need to explain further.

Conclusion

I hope I made my point pretty clear now that when I am talking about DEPTH or perspective in a photograph, I am referring to all these levels (fore/middle/background) and their relationship with the entire picture. That makes a photograph complete and it makes people believe what they are witnessing. It makes it more interesting and entices them to look into each and every detail of a photograph.

You have some good examples of depth in a photograph? Do share with me 🙂

Photography Composition Essentials: Negative Space

15453828827_207bbaa581_z

I am a big fan of composition articles on internet as I consider composition as one of the most important topic in photography. If there is only one thing that can create the biggest impact on your photography m then it is composition. It is the key to successful photographs. I do agree that lenses, camera bodies and other accessories do affect your photography to a certain level. But if you don’t want to spare a dime and still want to make huge difference than start concentrating on your compositions from now on.

In fact , it’s a good exercise and challenge for all of us who are suffering from GAS (Gadget addiction syndrome) is to stop looking for good and cheap deals for camera bodies and lenses and start giving more attention to our COMPOSITIONS. Just make a promise to yourself that for the next six months I will not buy any new equipment and just experiment with composition techniques to make my photographs stronger than before. After this , you will be amazed how much this will affect your photography in the long run.

So to start with myself, I am starting a series of posts on composition techniques of photography. I will try to write one post every week for each technique and attach some of my own photographs for samples. You guys can post your stuff in comments and I will add them here as well. Since I am a big fan of minimalism, I will start off with NEGATIVE SPACE.

Negative Space:

Negative space is actually a breathing space in photograph. It is a place where viewer’s eyes can rest after observing other details in photograph. It will actually calm down your eyes and ease your mind. It brings a sense of serenity to image. The viewer will feel more comfortable and can concentrate more on the subject rather than wondering around distractions. Check out some of my samples and observe the use of negative space in composition and do submit your so that I can attach them too for better understanding.

15616875214_c7bf1267de_z
lone survivor by Imran Zahid
15842713043_75976e3cf1_z
Yiti beach by Imran Zahid
15881167768_ee875a0d92_o (1)
Fishermen by Imran Zahid
15742645453_5db7bbd1aa_z
Standing tall by Imran Zahid
15520761179_b54d768f4d_z
Why so serious 🙂 by Imran Zahid

A beginer workflow to STREET Photography

Street photography is one of the most feared and uncertain type of photography in which almost nothing is in your control and almost everything is based on luck. A lot of new photographers who like street photography because it’s classy/candid look and feel are very nervous because it demands too much time and luck.

Also the success rate of these types of shots is also very low as you get a lot of crappy shots when you come back home and try to edit them. A lot of factors are there that can go wrong very easily like improper focus, background distractions, photo bombing etc not to mention a lot of time you need to face people’s anger and sometime security issues. But guess what? That is the reason that makes street photography so much satisfying and fulfilling because after so much frustration when you get proper shot it worth a lot. You can easily compete with any professional photographer if you have a decisive street photography shot.

Like any field, if you carefully analyze the problems, you can come up with some workflow that will produce maximum results with very low chances of getting things wrong. I am by no means a pro street photographer but over the time I have come up with a workflow that works for me most of the time.

Look for interesting faces / Emotions.

This is by far the easiest step in getting interesting photos. Look for older people or children. Their faces are very expressive. Also people with unique clothes and emotional state make your photos pop because of their unusual settings.

15552658549_39ea2afc08_z

Look for related or contrasting background and foreground interest.

Street photography is all about complete environment. You should try to guide viewers from subject to background. And to do it seamlessly your background should be related. Highlight your subject but try to put some meaningful and unobtrusive background as well. Don’t try to completely remove it or use too simple background, as it kills the purpose of street photography. Also sometimes a very contrasting background makes a strong visual statement as well. Play carefully within limits.

Look for some truly beautiful geometric composition.

This is where street photography gets visually very interesting. But it’s also very difficult and if you nailed down this aspect you will get a master piece. Composition is always the key.

15486119148_da71d38fd1_z15135384124_cca1d80b06_z

Look for some tried and tested conditions.

Look for some unique shadows or nice reflections on glass or stagnant water on streets. Contrasting lighting conditions both during day and night is also very dramatic. Symmetry and repetition is also very pleasing to eyes.

15486699860_874eb5331b_z15848445992_e4065f61f6_z

Shoot in both Color and black and white

Its very tempting to always shoot in black and white because it looks classic and it suppresses a lot of background distractions. But a part of these two reasons, try to learn other aspects of B&W also like shadows, textures and contrast. B&W tends to look a little more sharp as well. But color has its advantages too. Sometimes a photo with color is more interesting than B&W as its more natural cause we used to see in colors.

15635607914_18d7c4e370_z15899694386_887740328b_z

Always wait for the DECISIVE MOMENT.

This is by far the most important point of street photography and the whole topic revolves around it and that is why I make it a separate heading and not a pointer .Before clicking just think is it the right time to take it. How it will work if I wait a little longer or If I click a little earlier. If it makes a difference, do it accordingly. This is the point that actually creates a story.

8028796793_a7ededfa93_z8028796404_f3bacc0551_z

Below are some of the side thoughts that you should keep in mind and that will come handy all the time.

1.       Be courteous to your subjects at all times. Don’t try to exploit them. If they don’t want to be photographed, leave them alone. You will get a million other opportunities. Be ready to say sorry and smile and never confront with local people.

2.       Make yourself familiar with that place. A little planning will never hurt. Try to come to same place again sometime. You will be already familiarized with locations and its settings. That will help you to plan your shot in advance.

3.       Talk to people after you photographed them. Give them your business card. Ask them if they want these photos and send them later through email as a courtesy. Make them friends. It will be much more fun and less daunting.

Conclusion

Don’t expect that every time you go out for street photography, you will get some master pieces. It’s very difficult, so be patient and try to enjoy the whole process of getting shots and not just the final shots. Try to improvise as you learn. These are just few pointers that I compiled because they worked for me. Try to come up with your own tips and tricks. I am working in Middle East where people are generally not very friendly and they are suspicious of camera as well. But if you have a nice friendly smile on your face and you are not intruding their personal space aggressively than its very a enjoyable process and not to mention that final result is much more satisfying.

Blog at WordPress.com.

Up ↑