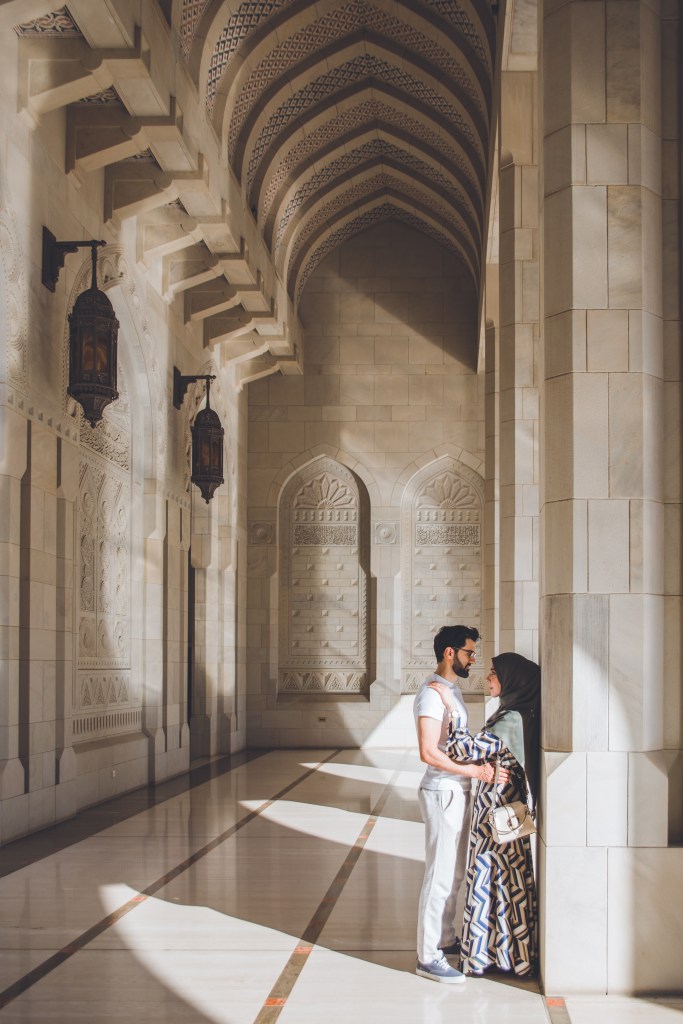
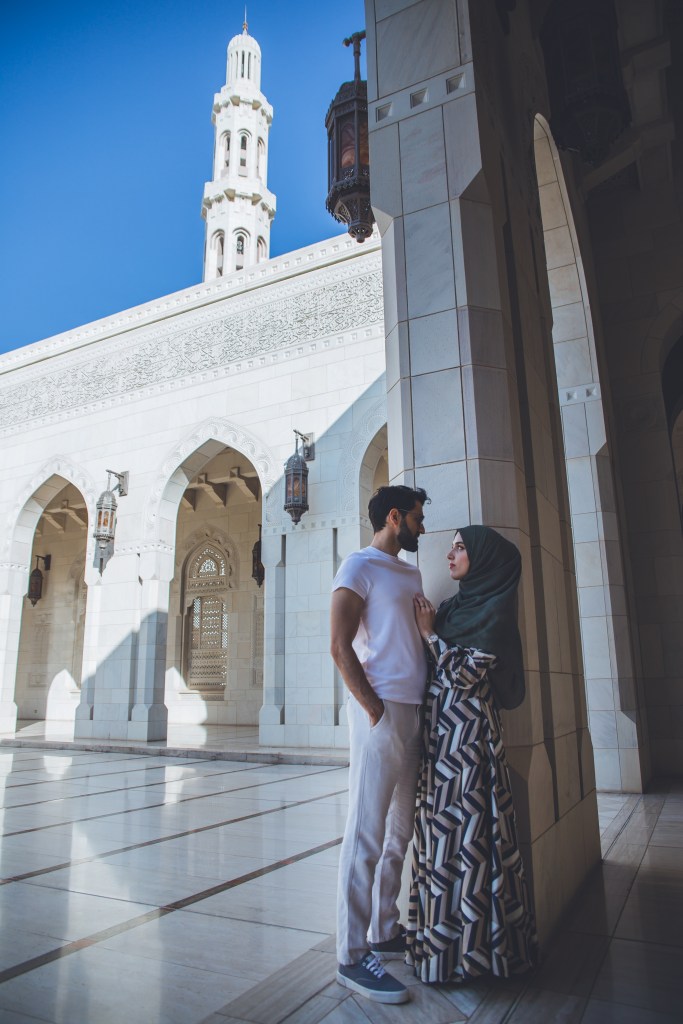
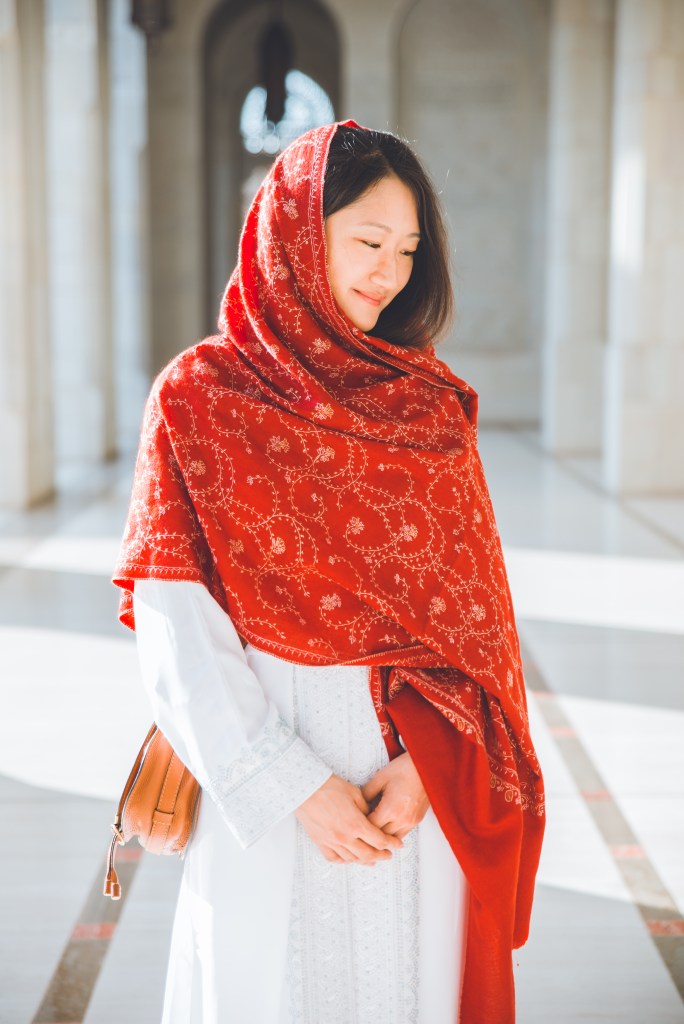
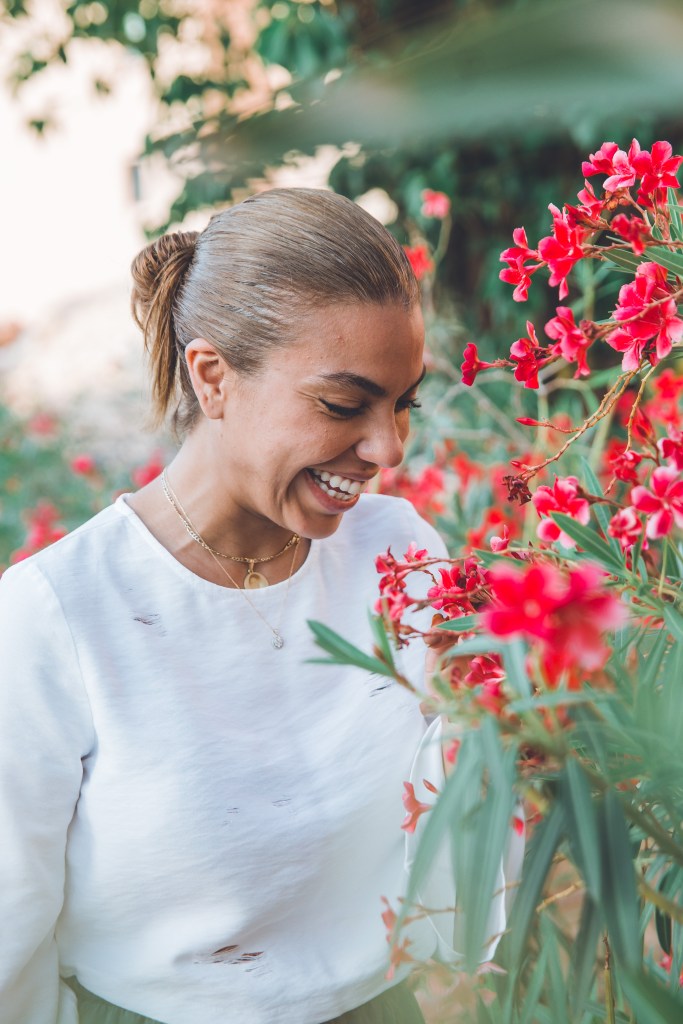
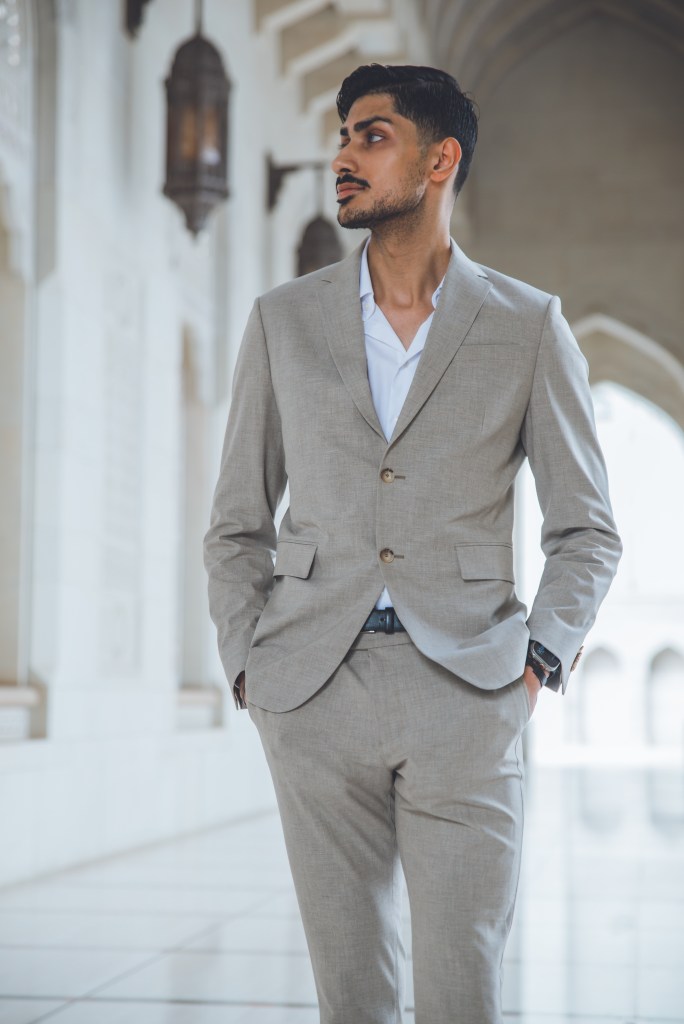
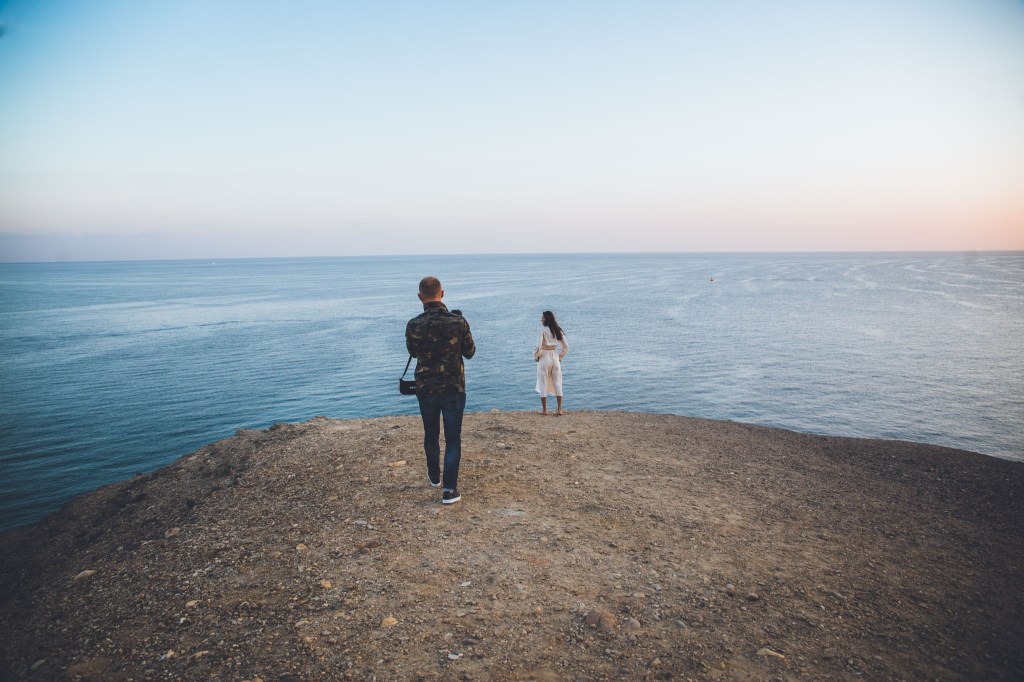
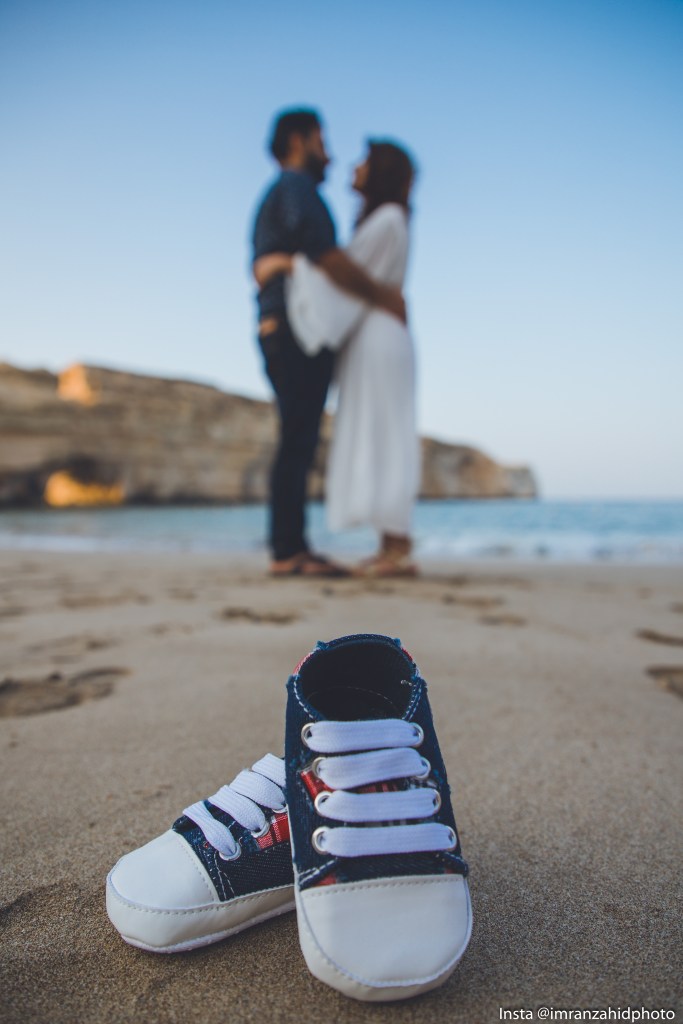
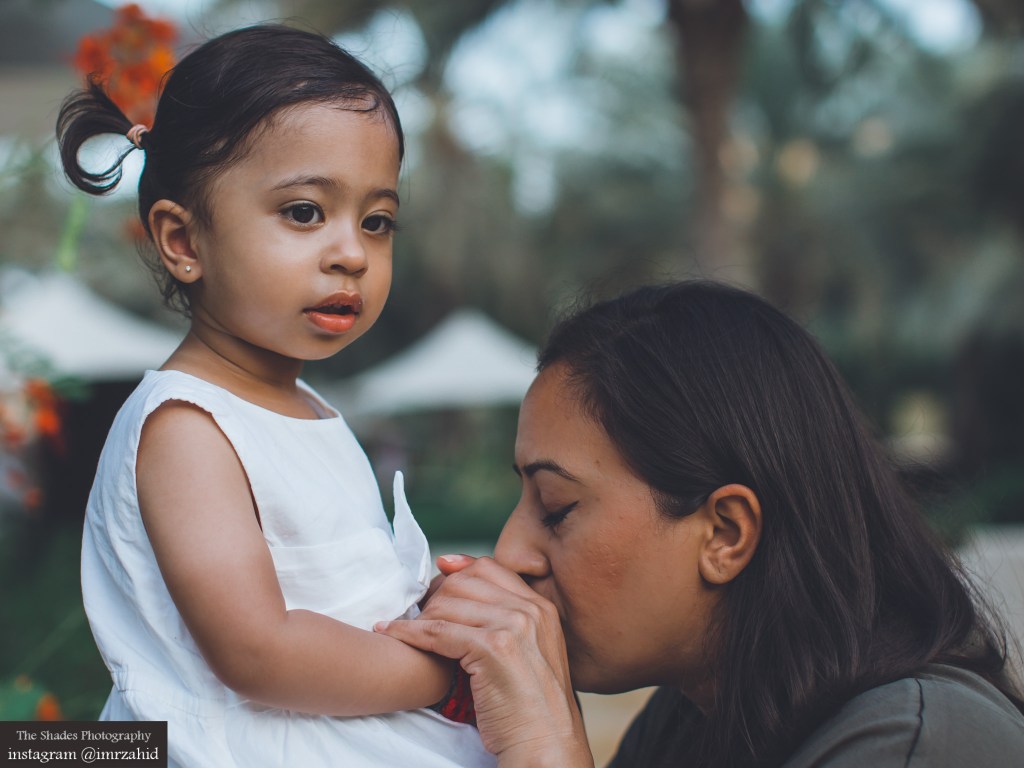
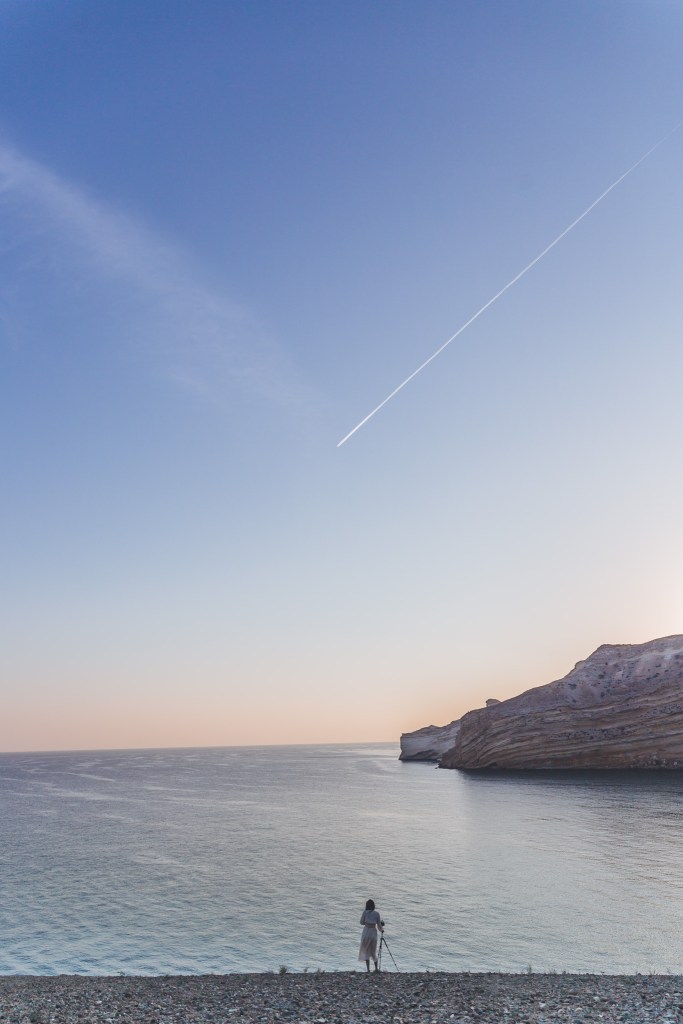
Experiences are everything. Only a great photograph can accurately capture the emotions, experiences and feelings connected with your travels. Oman is full of Traditional and cultural activities, Old traditional markets, beautiful and serene beaches and Old Islamic Architecture and above all, beautiful and friendly people We’ve our own photographer to capture your precious travel moments in Oman.
Imran Zahid VIsual can capture your destination vacation in Muscat, Oman and deliver the perfect travel souvenir — priceless memories.
Want to ask more details about the package? simply start your query on whatsapp
(+968 95842090)
Below you will find various packages to select from as well as sample photos.
The packages and pricing below apply to Muscat city. We are open to custom photography assignments as well. Tell us your requirement in advance at im.zahid@hotmail.com and we can design a complete photography package tailor made for you.
Packages
Bronze
Silver
Gold
Design your own
30 minutes
60 minutes
2 hours
Perfect choice if you need longer photo shoot. Contact us for more details.
1 location
1-2 Locations
multiple locations
20 Photos
40 Photos
60 Photos
Only digital files included
Only digital files included
Only digital files included
175$ (70 Rials)
300$ (115 Rials)
400$ (150 Rials)
Terms & Conditions
1. We deliver your photos within 3 business days. 2. All photos are beautifully edited and in hi-resolution. 3. We will deliver few photos the next day so you can share it on your social media if you want. 4. In case of multiple locations, you need arrange your conveyance and all locations will be inside muscat city. 5. You can always purchase extra photos at nominal prices if you like extra photos outside the package as well.
Everyone loves vacation. Usually when we travel, no matter how far and wide, new or beaten path, we all love to document our experiences.
Sometimes it’s our our simple vacation to some nearest locations for a change. Or sometimes we do travel to get some inspiration for our photography.
Travel photography is by far the most loved genre of photography. Here are few tips that will surely help you maximize your productivity while doing travel photography.
1. Pick the right gear.
Selecting proper gear is of prime importance in my opinion. It somewhat depends upon the purpose of vacation. Very few people actually travel only for photography. Majority of people just want to clear their minds. They want to enjoy and have a good time. And in the process they want some good photographs.
The key is to travel as light as possible. For me its just one camera body with one walk around lens. I try not to pack a complete camera bag with 2,3 lenses, laptop and accessories etc.
I always take my canon 6D with sigma 24-70 f2.8 lens. Yes I do miss 20mm focal length for landscapes and 135mm for street portraits. But keeping just one camera-lens setup forces me to look for creative alternatives.
It’s very easy to dive too deep into photography while You are on your vacations. Remember, vacations are meant to enjoyable and if you are too serious about your photographs, you will end up feeling exhausted by the end.
Document your entire journey along the way. Take photographs of your car, hotel room, restaurants where you dine and any tour guide or local food. Capture all the crazy and silly moments. Its these photos that you will cherish after 10 years.
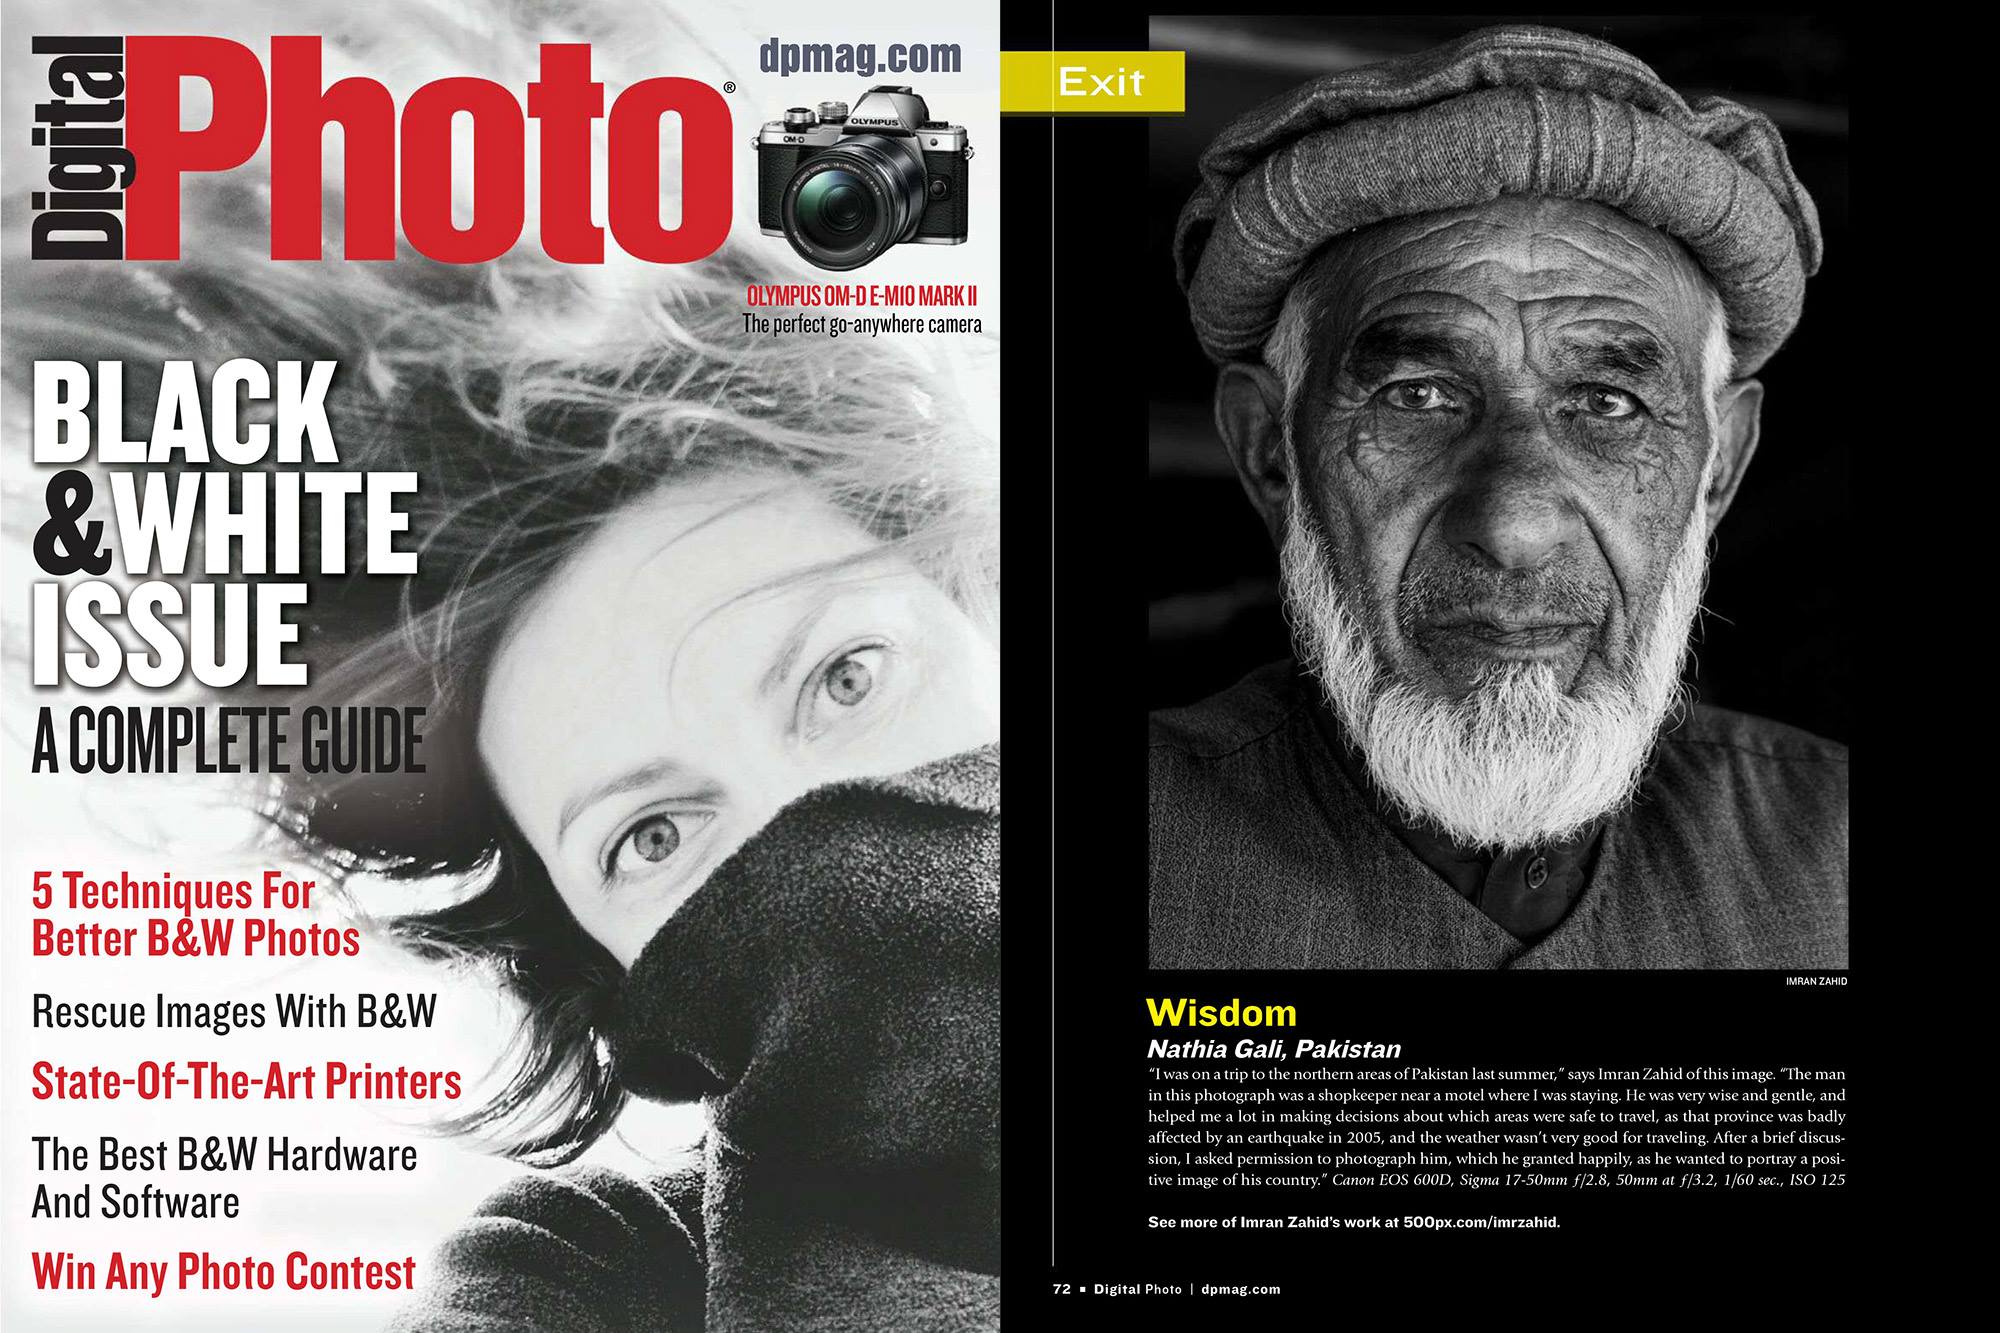
While documenting all these things, you might get a lot of good professional photographs as well. I always try to take proper portraits of people I am interacting while I am on journey. I met one old guy (shop keeper) once on my vacation. I took his portrait and that picture ended up as full page feature on Digital Photo Magazine.
My Travel Photo as a full page feature in DP Mag
3. Hire a Local Photographer as guide.
Not all of us can afford a tour guide, yet alone a photographer guide. But if you are serious about photography or you are on some project, hiring a local photographer will go along way.
Local photographers knows all about the place. they know which time and location is best for which type of photograph. They know where permissions are required and where you can simply sneak and take your shots quickly.
You can search local photographers on instagram. Contact them using DM and describe what you want exactly. Once agreed on a price, you are good to go. I used that concept and now I started my own business based on this.
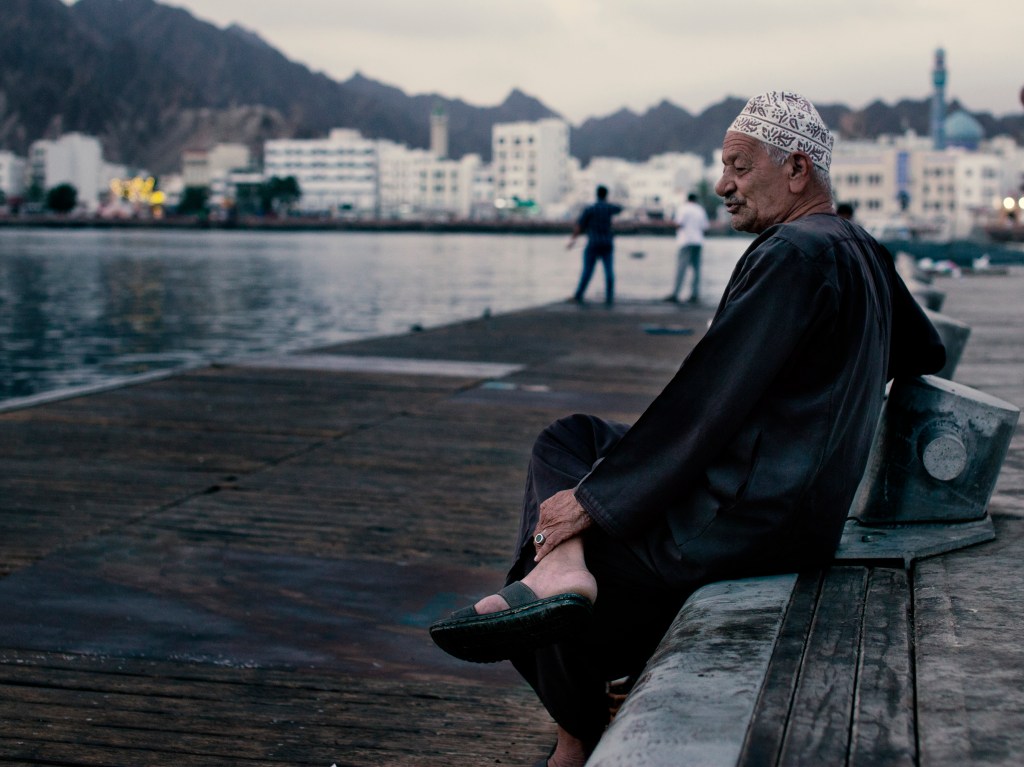
Unless you are on a specific project, don’t be too eager. Divide your day time into chunks of time for photography and leisure. Golden and blue hours are definitely important and should be taken seriously for good landscape and outdoor portrait shots.
But after sun is high enough or after dark, still you can do a lot. Harsh light might be bad for landscapes but it is very good for street photography. You can make use of strong light and shadows during this time while walking inside markets and pathways. Night time is good for documenting night life of a city. Even same place looks enitrely different during daylight and night time.
So use your time wisely. Also use bad light for your leisure as much as possible. I usually take a sandwich or some snacks during actual shoot and go to restaurants, movies,shopping and meeting friends during bad light. That way I utilize my time more efficiently and balance my photography/leisure time.
Light and shadows
5. Do your Homework.
It doesn’t matter whether you hire a local guide, photographer or you have a friend. Always do your homework before going to vacation. Always search for worthy locations and local activities. It will help you in making a blue print of what kind of photographs you might end Up when your vacation finishes.
When you are hiring a guide or photographer, always contact them and discuss these in advance. Check with your fellow photographers or friends who have been there. Once your homework is done. It will be much easier for you to check if everything is going in a right direction or not.
6. Mingle with locals.
If you really want to make the most out of your vacation, try to communicate with locals. I know, when you are travelling to distant places, there is a language gap. But you will always find someone that can do it for you or someone that knows a little bit of English.
Communication with locals open new areas for you. You might get unexpected opportunities of photography. Your knowledge will widen as you start communicating with them. You will start to know their customs and traditions etc.
I always communicate with locals and try to capture the real essence of that area. For street and portrait photography, it is the best strategy.
7. Don’t Compromise on your Safety.
Not all countries and cities are completely safe. Even some of the safest countries have few cities that are not safe. So, if someone informs you about something, do take it seriously. If you end up losing your expensive gear or get injured, it will ruin your vacation.
Don’t try to look too overly classy. Hide your brand name on your gear. Keep your eyes open if you think something fishy is going around. Always check with locals about security situation if you are in a city that has a bad reputation.
Some places require permission from certain authorities before taking pictures. Check for these things from local guides or hotel staff first.
Conclusion.
The key to good travel photography is a combination of being at the right place at right time. Whether you are a PRO or an amateur photographer. Whether you have an expensive camera setup or a simple point and shoot. These travel photography tips will still be applicable to you.
And last but not the least. Travel photography is supposed to be fun. So keep it that way. Don’t stress out if you are not getting good shots. Just keep your cool and make use of your time based on my tips while enjoying your vacation.
Photography is an art form. And ART is subjective in nature. It is difficult to define what is cliche and what is not. But, there are certain types of photographs that are too common over the internet and normally they are considered as a cliche.
Cliches are called cliches for a reason. They all started as a normal thing. Normally they are very good ideas and that’s why they became so popular in the first place. But at some point their overuse by people make them a cliche.
With the ever growing market of cheap consumer level DSLRs and PRO phone cameras, Everybody is now a photographer. If you are somewhat serious about the art of photography, you need to stop doing following photography cliches and start bringing your own creative touch in your photography.
1.
Always using Black and White for Street Photography.
We
all at some point or another, tried our hands at street photography. It looks
artistic and classy. But why everyone is converting their street photographs to
black and white?
Most
of the famous street photographers had their work in black and white because
they belong to black and white film era. At that time, either color cameras
were not present or too expensive. So, their work is mostly in black and white.
Most of the iconic street photographs are black and white.
Now
that we have powerful DSLRs, there is no need to go for that look. Only go for
black and white if it makes sense. Lets suppose, you want to get rid of uncontrolled
distraction (different colors of cars and sign boards that don’t go with your
color theme) or you want to emphasis on light and shadows.
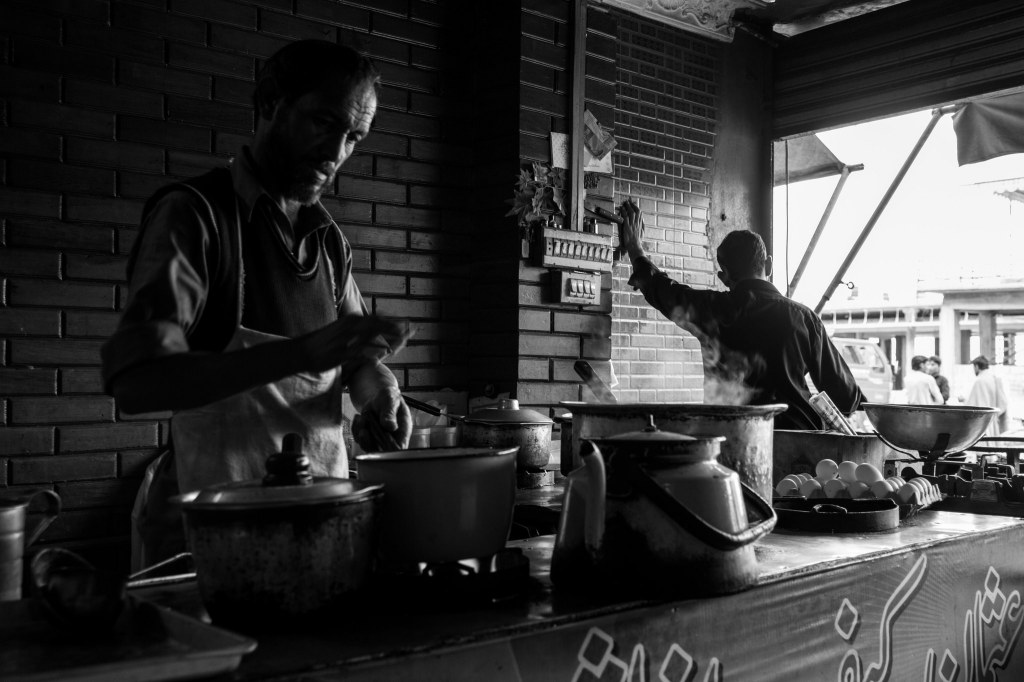
The
first image here is of a Porter on Karachi Railway station. Black and white
won’t work here as people will not able to distinguish his specific Green,yellow
and red uniform.
Porter on Karachi Railway Station
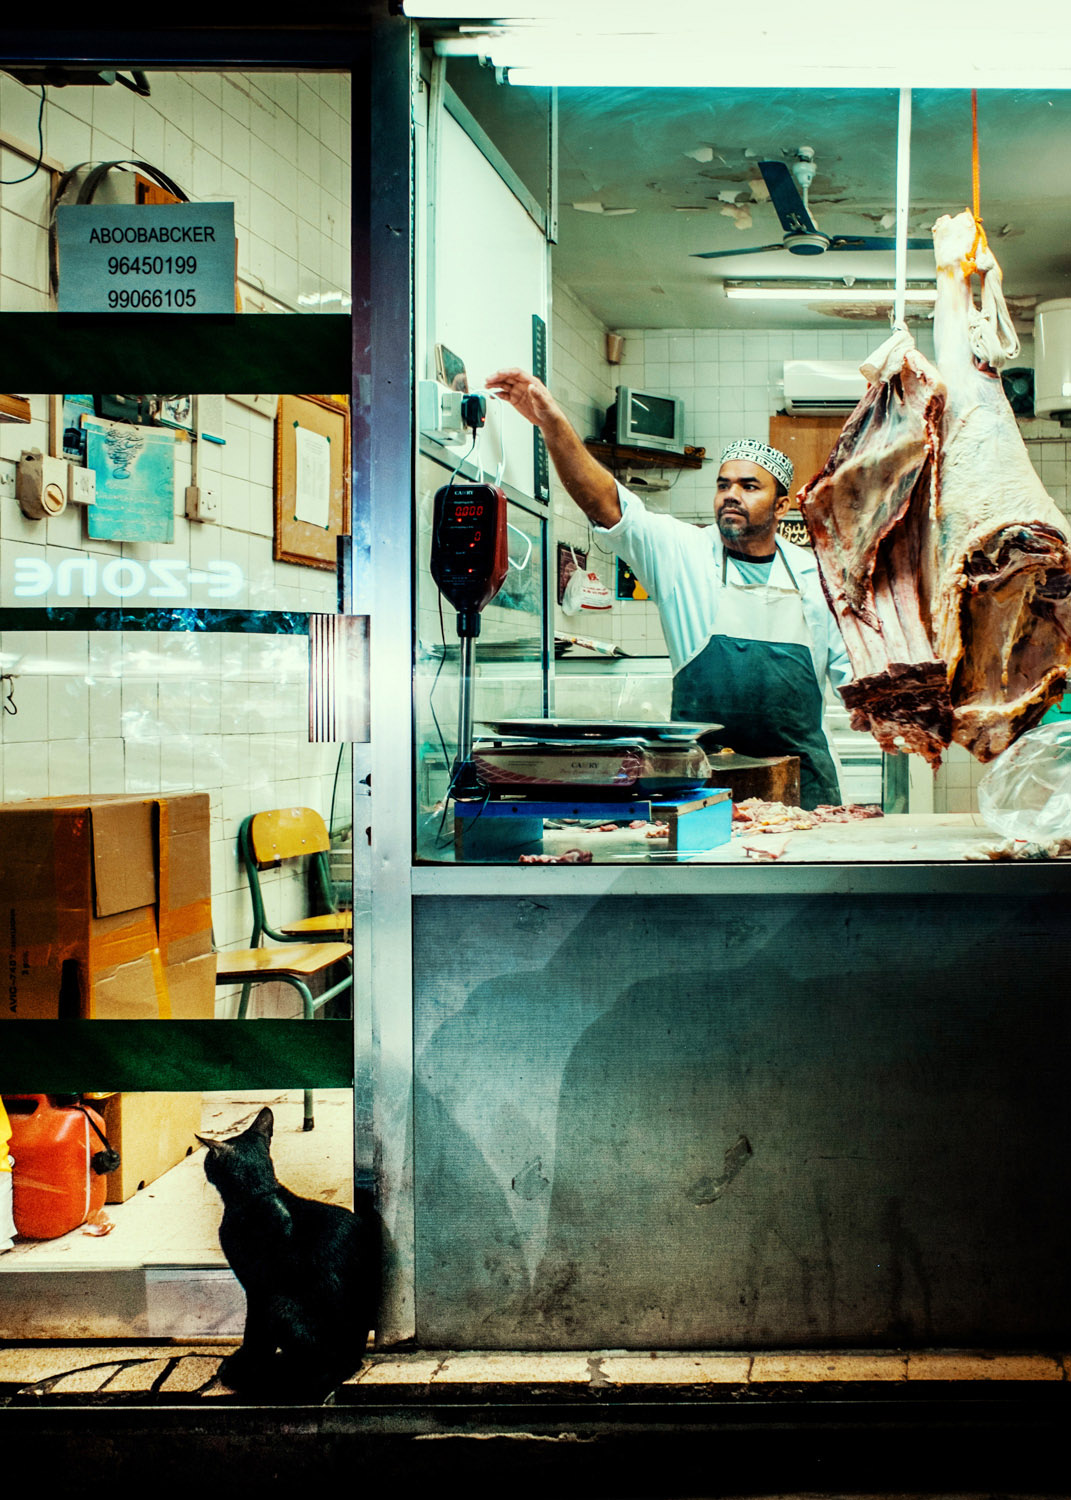
This
second image is of a butcher in Muscat city. This whole image is pretty much
teal in color and converting it to black and white will render an image with
very less contrast.
Black and white is a creative choice. Don’t blindly use it because most famous street photographs are in black and white . Understand its PROs and CONs and do it creatively.
Butcher in Muscat
2.
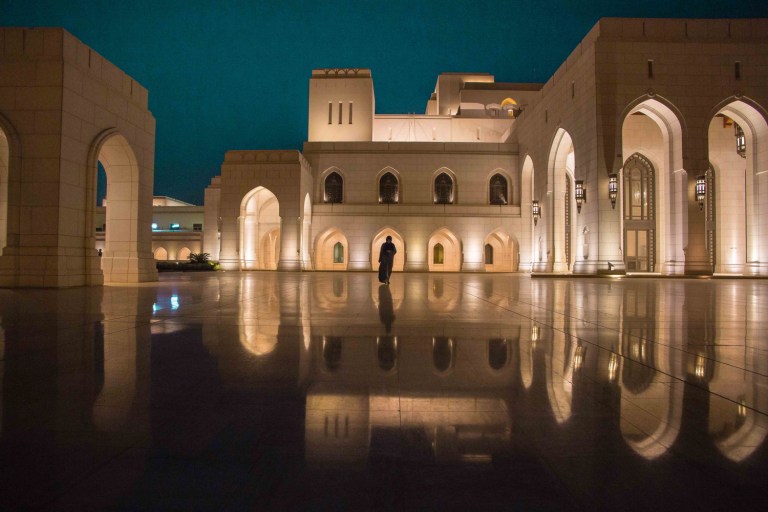
Punchy High Dynamic Range (HDR) images.
High
dynamic range photography is a process where you capture multiple images. One
for each shadows, highlights and mid tones. You blend them together to make an
image with details in both dark and bright areas. It all started when camera
sensors were not that strong as they are now a days.
Today’s
consumer level DSLRs and even high end point and shoot cameras have very
powerful RAW image processors. All you have to do is to adjust highlights and
shadows along with blacks and whites and you are good to go.
Processing
single RAW file will give you much better and natural results than blending
multiple images. Yes, HDR blending has its own place. It comes handy when there
is too much contrast in a single image. But overall HDR images look unnatural
and over processed.
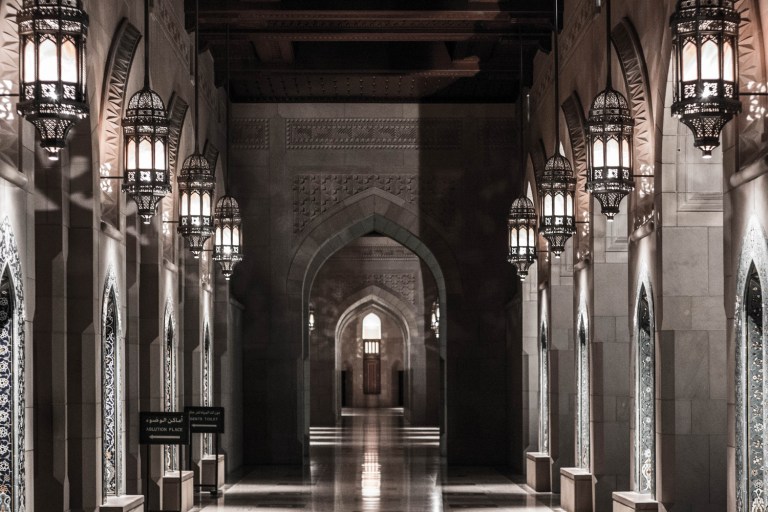
Both of the images here are HDR images of a Mosque from a single RAW file. I only used shadows and highlights adjustments to bring details in specific sections. You can see the details in both bright and dark areas.
Grand Mosque Muscat Grand Mosque Muscat
3. Sticking to rule of thirds at all time.
Almost
everybody know the rule of thirds. It’s the first rule that you learn when you
start learning composition in photography. Rule of thirds is very scientific in
nature and 9 out of 10 times it gives you good results. And that makes it a
Cliché.
There
is a famous saying that ‘Rules are meant to be
broken’. It’s true. Just by deviating away from some industry standard will
automatically make you stand out among the crowd.
But it has to be done with care. You can avoid the rule
of thirds in symmetrical compositions very easily. You can avoid it in minimalistic shots as well.
With
practice you will come to know when you will get better
results by not following this rule. Whenever you shoot some picture, always
experiment with different versions. Rule of thirds is a
good starting point for your composition. But since everyone uses it all the time, it’s a bit boring.
Alternatively,
you can place your subject in extreme sides or corners and still make an
attractive composition by placing some elements on opposite side to balance it.
Both
the sample images here doesn’t strictly follow rule of thirds but still they
have an interesting balance and composition.
Royal Opera House Muscat Jebel Akhdar Mountain
4.
Following histogram religiously.
Histogram is very powerful tool that lets you decide
whether you have a properly exposed picture or not. Understanding histogram is
of prime importance. Just by looking at it, you can tell whether you have pure
whites or pure blacks in your image, i.e. whether
you lose details in highlights and shadows or not.
The
problem is, histogram only tells you the range of the
brightest and the darkest pixels in your image. It doesn’t know what you
want to shoot actually. If you want to shoot low key or high key image, the histogram will show that you are clipping shadows
or highlights. In this particular case, I want to shoot a low key silhouette
image in Muttrah Souq, Oman. It is ok since I deliberately want to clip both
shadows and highlights. It’s your creative decision.
High contrast image with histogram
Histogram is also good when you have an inconsistent LCD screen on your camera. Camera LCDs
are normally much brighter than actual image is. Sometimes the image looks
properly exposed on screen, but actually it’s a
bit underexposed. You have to pull shadows in post later on to balance it and
it will introduce some noise.
Checking histogram will tell you this at the time of the shoot. You can adjust your settings in camera, and you don’t have to push it in the post. You must know how to read a histogram. But you should also know when to follow it and when to follow your own creative guts.
5.
Using Image Borders
Gone
are the days when the only outcome of photography is the
wall mounted frame. This age is the age of social media. Yes, wall
hanging frames still have their own place. You can’t deny that. But making your
image compatible over the internet is important.
People
normally add borders because of two reasons. Either their frame corners are not
tight enough and they need some sort of borders to keep it under boundary or
their subject is not prominent enough.
Try framing your image in a way that it naturally
creates a border around your subject. You don’t have
to use frames within frame technique all the
time. Just try to look around the edges of your frame and place something
strategically to guide viewers’ eye.
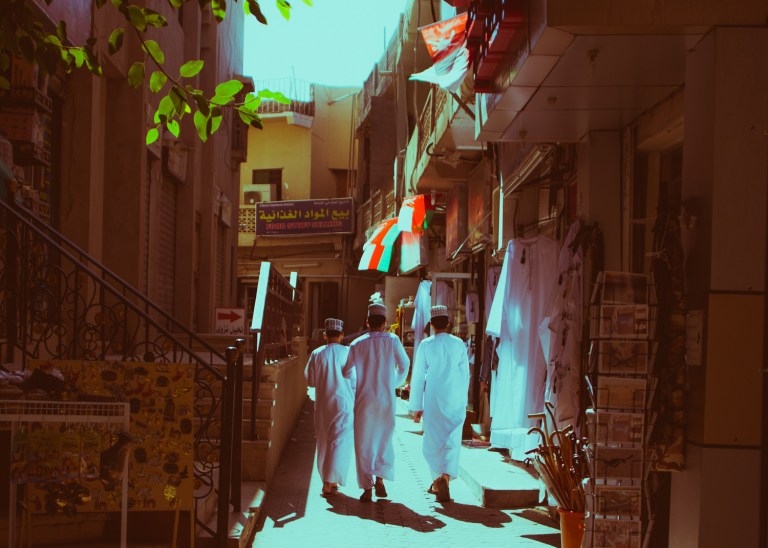
Here
I shot these three guys walking in Nizwa market in Oman in a way that it
creates a natural frame around them. Although it only covers left and right
side of image.
Nizwa market in Oman
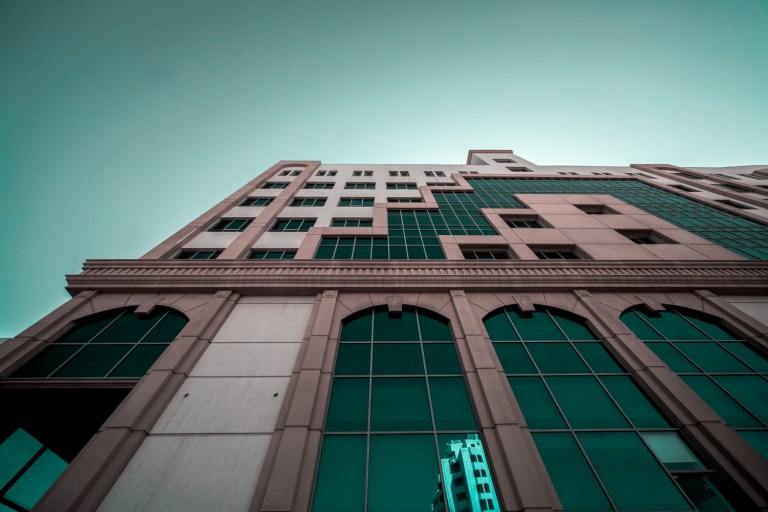
Another
technique is to use a vignette in your images
either by using dodge and burn technique or simple darken your edges and
brighten the subject. In this image, the sky is completely plain, so I added a little vignette to create a border.
Architecture build
6.
Using cliché Lens choices.
It
is common to shoot Landscapes with wide angle
lens, Street photography with 50mm and portraits with an
85mm or 100mm lens. Thousands of images are uploaded over the internet on a daily basis that follows the same
exact rule.
Every
other shot that follows these clichés looks almost identical. Like the rule of thirds, these lenses will give you great
results. The wide angle lens lets you include
foreground and background both in focus. Telephoto creates simple background
with flattering facial features. But try something different to create a new
perspective.
Like
I shot this landscape and architecture image with a 50mm lens. It’s a totally
different perspective of this place as compared to all other pictures of the same place. You can try portraits with a wide angle
and street photography using telephoto lens as well.
The Road Grand Mosque
Conclusion
It
doesn’t mean that you should not use these techniques at all. Using a bit of all
of these techniques in moderation is all you need to avoid clichés.
It’s
really hard to find the subject that has never been photographed before. Try to
look subjects in a different way. Try different angles. Try different lenses
and filters. Try different post processing techniques that are not common.
One
interesting way is to start a project of photographing the same subject in 15
different ways. It will force you to look at the subject in an entirely
different way. That practice will help you in your photography in general.
Again
photography clichés are not bad. It’s just that they are way too common and
they won’t help in bringing your very own personality in your photography. Now,
try to be creative and tell me in the comments section which cliché you find
most annoying.


Recent Comments